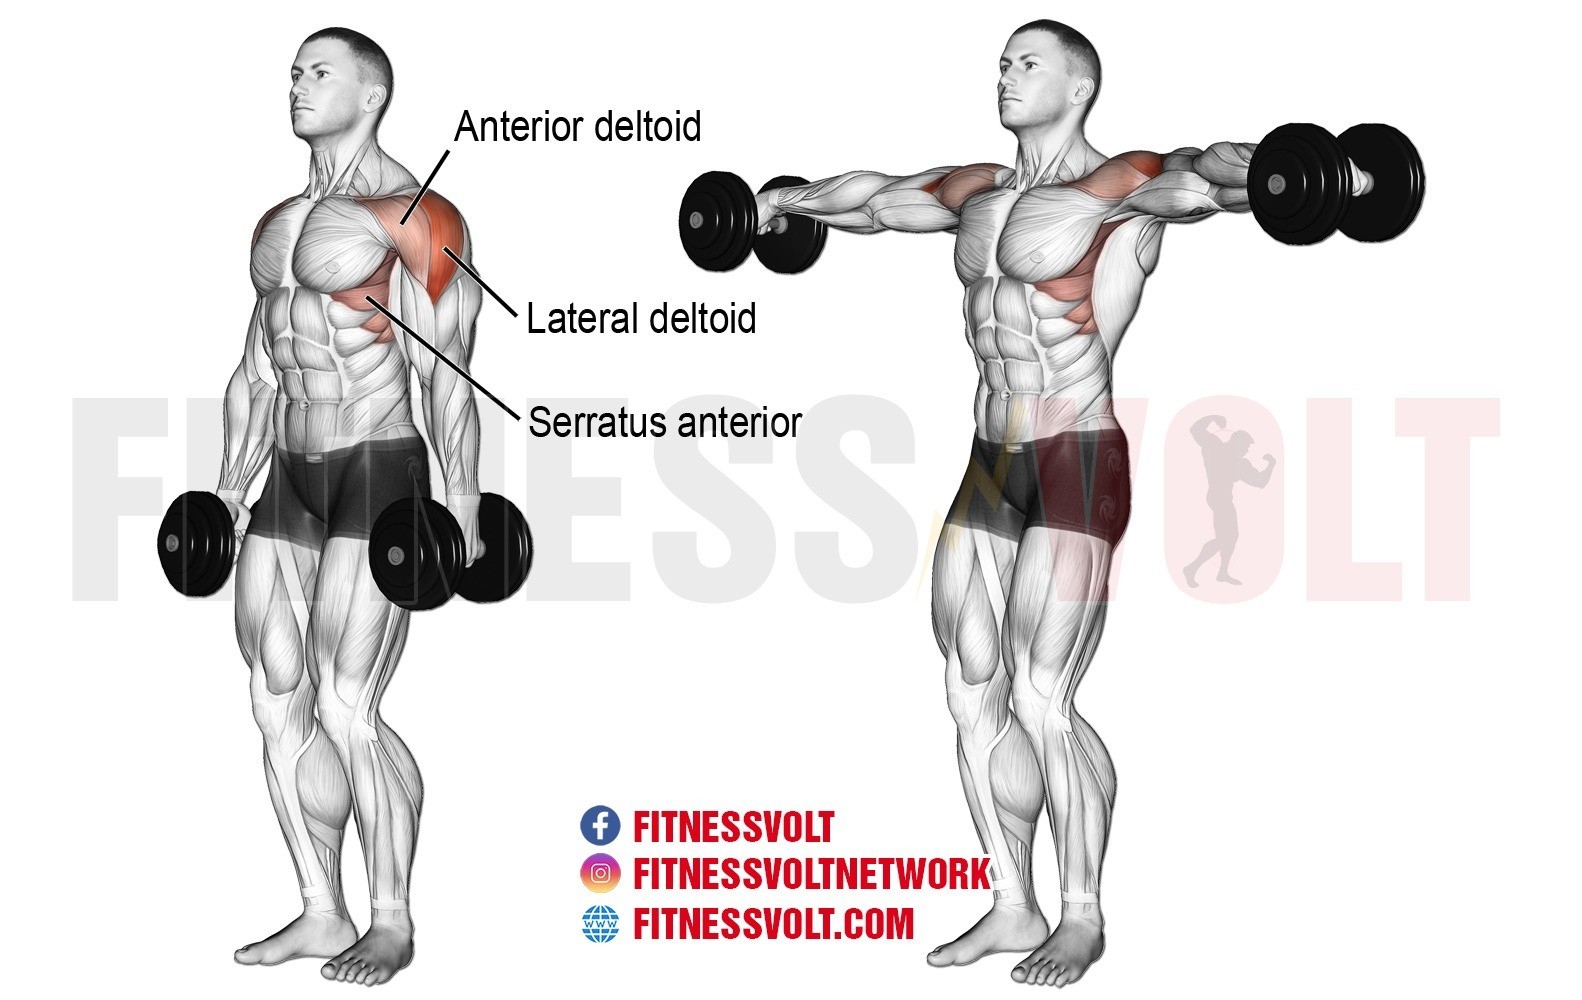
One of the most popular exercises for strengthening and toning the shoulders is the lateral raise. This exercise is an isolation movement that targets the lateral deltoid muscles, also known as the middle delts. The lateral raise is performed by raising the arms out to the sides until they are parallel to the floor. In this article, we will discuss the muscles worked during the lateral raise, how to perform the exercise correctly, and some tips for maximizing your results.
Muscles Worked During the Lateral Raise

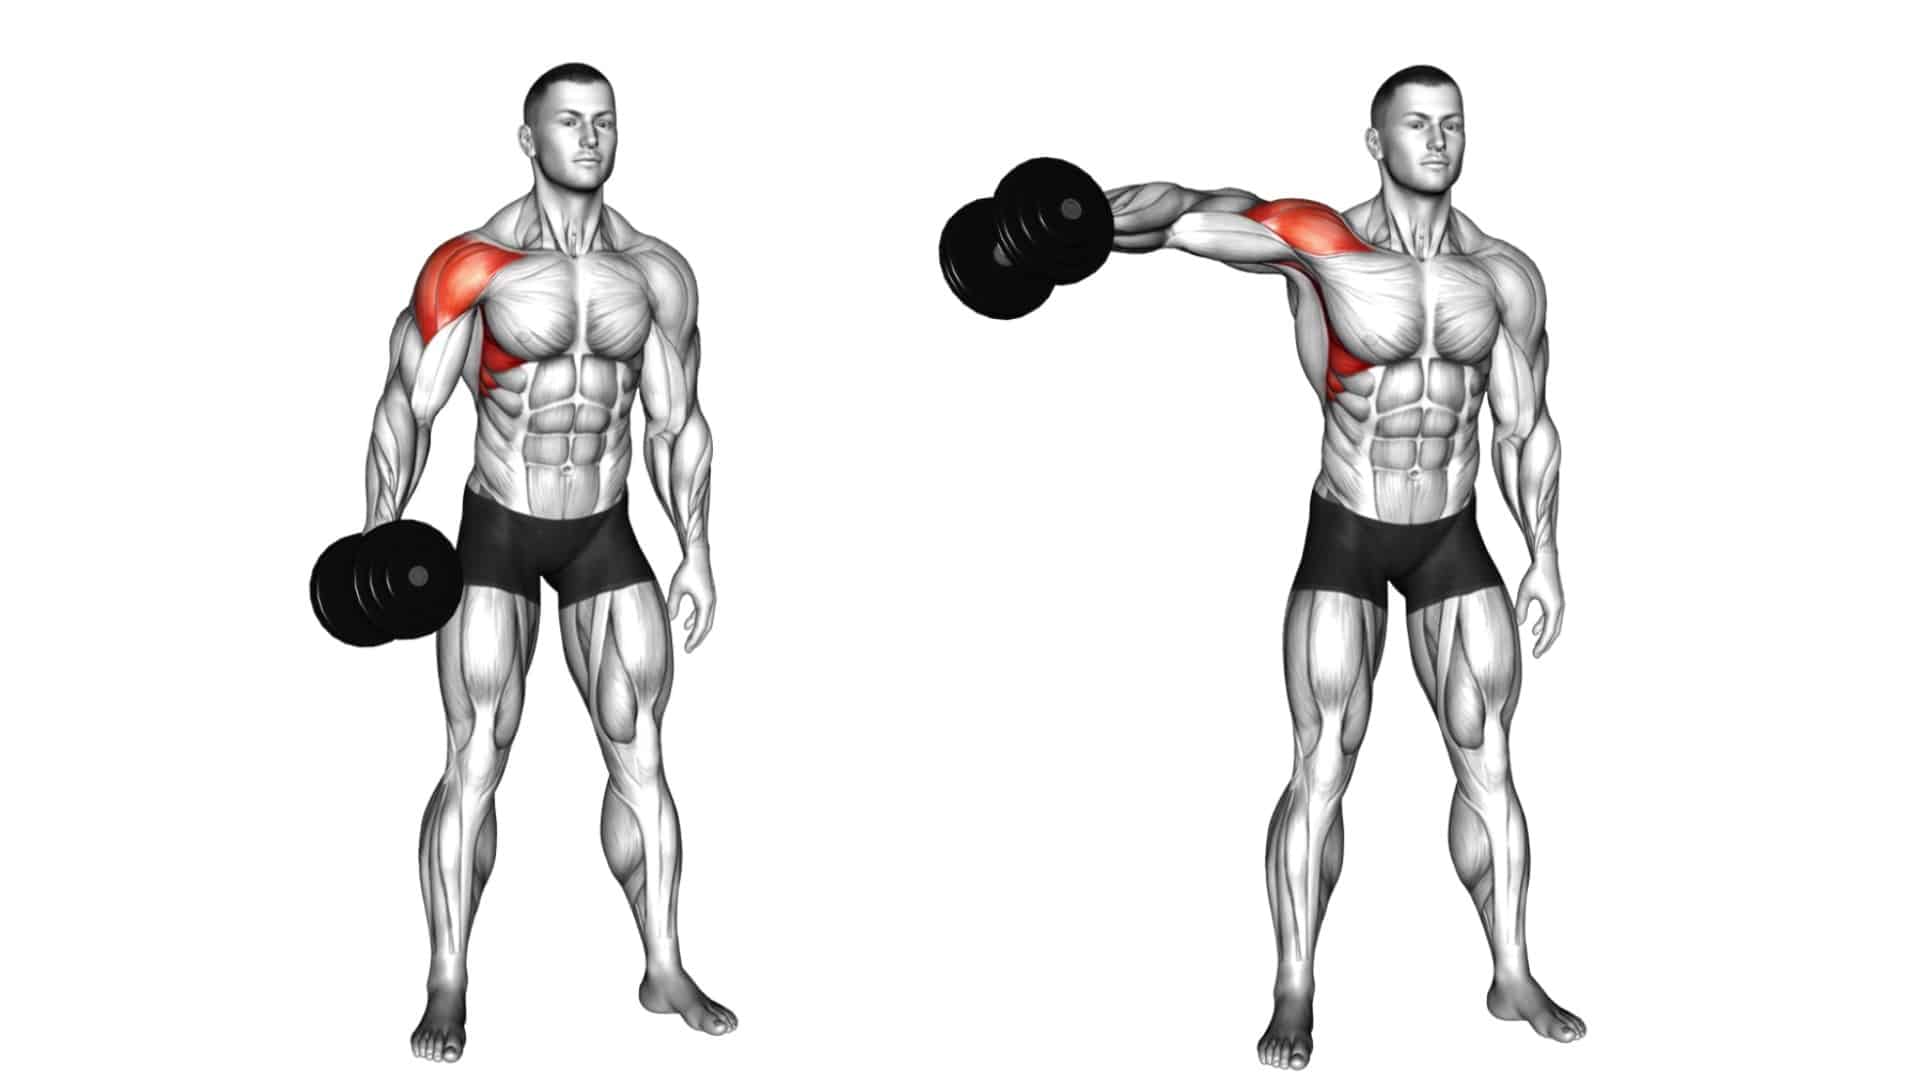
The primary muscles worked during the lateral raise are the lateral deltoids. These muscles are located on the side of the shoulder and are responsible for raising the arm out to the side. The anterior deltoids, or front delts, and the posterior deltoids, or rear delts, are also involved in the movement, but to a lesser extent. The trapezius, or traps, and the rotator cuff muscles also assist in the movement.
How to Perform the Lateral Raise

To perform the lateral raise, stand with your feet shoulder-width apart and hold a dumbbell in each hand. Keep your arms at your sides with your palms facing inward. Slowly raise your arms out to the sides until they are parallel to the floor. Hold for a second and then lower your arms back to your sides. Repeat for several repetitions.
Make sure to keep your elbows slightly bent throughout the movement to avoid putting too much stress on the shoulder joint. Also, avoid swinging the weights or using momentum to lift them.
Tips for Maximizing Your Results
To get the most out of your lateral raise workouts, try these tips:
- Vary your grip by using different types of dumbbells or holding the weights with your thumbs pointing up
- Increase the weight gradually over time to challenge your muscles and promote growth
- Perform the exercise slowly and with control to maximize muscle activation
- Incorporate other shoulder exercises, such as overhead presses and front raises, into your workouts for a well-rounded shoulder workout
Conclusion
The lateral raise is an effective exercise for targeting the lateral deltoids and improving shoulder strength and definition. By performing the exercise correctly and consistently and incorporating other shoulder exercises into your workout routine, you can maximize your results and achieve stronger, more defined shoulders.
Related video of Lateral Raise Muscles Worked

Shoulder muscles play an essential role in our daily activities, whether it is lifting weights or carrying groceries. External rotation of the shoulder is an important movement that helps to enhance the shoulder's stability and strength. The external rotation of the shoulder is the movement of the arm away from the body, and it is essential in many activities such as throwing, serving in tennis, and swimming.
Shoulder Anatomy

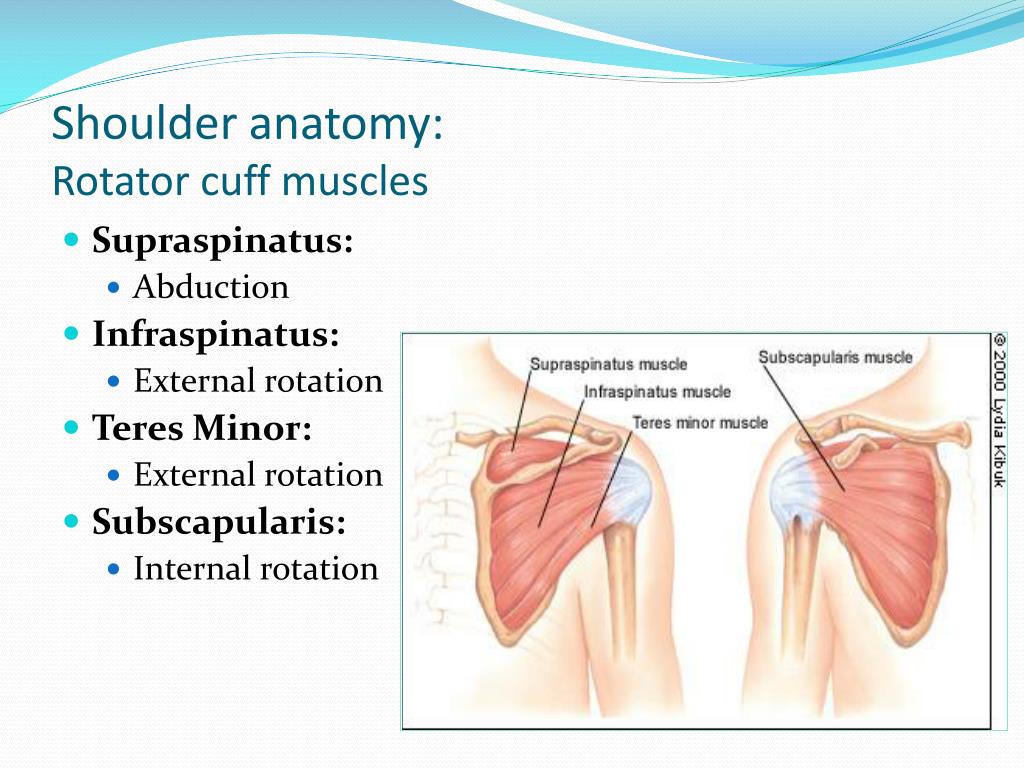
The shoulder is a complex joint that is made up of three bones: the humerus, scapula, and clavicle. The rotator cuff is a group of muscles and tendons that surround the shoulder joint and provide stability to the shoulder. The rotator cuff muscles are the supraspinatus, infraspinatus, teres minor, and subscapularis.
External Rotation Muscles
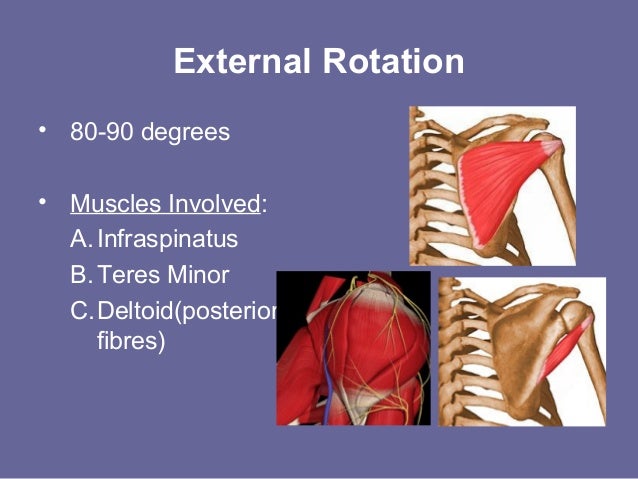
The external rotation of the shoulder is primarily performed by the infraspinatus and teres minor muscles, which are part of the rotator cuff muscles. These muscles are located on the back of the shoulder and are responsible for rotating the arm outward. The other muscles involved in external rotation are the deltoid, trapezius, and latissimus dorsi.
Benefits of External Rotation

External rotation of the shoulder helps to improve shoulder stability and mobility. It also helps to prevent injuries such as rotator cuff tears and shoulder impingement. Additionally, external rotation helps to improve performance in activities that involve throwing, serving, and swimming.
External Rotation Exercises

There are several exercises that can help to improve external rotation of the shoulder. These exercises include the external rotation with a resistance band, external rotation with dumbbells, and the prone external rotation exercise. These exercises should be performed under the guidance of a qualified fitness professional to avoid injury.
Common Mistakes
One of the common mistakes in performing external rotation exercises is using too much weight. This can cause injury to the shoulder joint and rotator cuff muscles. Another mistake is not using proper form during exercises, which can also result in injury. It is important to use proper form and technique when performing external rotation exercises.
Precautions

If you are experiencing any shoulder pain or discomfort, it is important to consult with a qualified medical professional before performing any exercises. It is also important to warm up the shoulder muscles before performing any external rotation exercises to prevent injury.
Conclusion
The external rotation of the shoulder is an essential movement that helps to improve shoulder stability and mobility. It is important to perform external rotation exercises under the guidance of a qualified fitness professional to avoid injury. By incorporating external rotation exercises into your workout routine, you can improve your shoulder strength and prevent injuries.
Related video of Shoulder Muscle External Rotation

If you are looking for a powerful exercise to target your triceps and upper chest, then the incline bench close grip is a great choice. This exercise is a variation of the traditional bench press and is performed on an inclined bench with a narrow grip. By using this technique, you can put more emphasis on your triceps and chest, resulting in a more defined and sculpted upper body.
How to Perform the Incline Bench Close Grip

To perform the incline bench close grip, follow these steps:
- Set up an incline bench to a 45-degree angle.
- Lie down on the bench with your feet firmly planted on the ground.
- Grasp the barbell with a narrow grip, placing your hands shoulder-width apart.
- Unrack the barbell and lower it slowly towards your chest, keeping your elbows close to your body.
- Pause for a moment when the barbell touches your chest, then push it back up to the starting position.
- Repeat for your desired number of reps.
It's essential to maintain proper form during this exercise. Keep your back flat against the bench, and avoid arching or lifting your head off the bench. Additionally, make sure to breathe in as you lower the barbell and exhale as you push it back up.
Variations of the Incline Bench Close Grip

The incline bench close grip can be modified to target different areas of the upper body. Here are some variations to try:
- Reverse-Grip Incline Bench Press: Instead of a narrow grip, use an underhand grip to place more emphasis on the biceps.
- Single-Arm Incline Bench Press: Perform the exercise with one arm at a time to improve stability and balance.
- Close-Grip Push-Up: If you don't have access to a barbell, perform a close-grip push-up on an inclined surface.
The Benefits of Incline Bench Close Grip

The incline bench close grip has several benefits, including:
- Improved Triceps Strength: By using a narrow grip, you can target your triceps more effectively, resulting in increased strength and definition.
- Increased Upper Chest Definition: The incline bench targets the upper portion of the chest, resulting in a more defined and sculpted chest.
- Better Shoulder Stability: The exercise also targets the shoulders, improving stability and reducing the risk of injury.
- Increased Muscle Activation: The incline bench close grip activates more muscle fibers than a traditional bench press, resulting in more significant gains in strength and size.
Conclusion
The incline bench close grip is a powerful exercise that targets the triceps and upper chest. By using this technique, you can improve your strength, definition, and stability in these areas. Try incorporating the incline bench close grip into your workout routine to take your upper body training to the next level.
Related video of Incline Bench Close Grip: Strengthen Your Triceps and Upper Chest

Push ups are one of the most effective exercises for building upper body strength. They work the chest, shoulders, triceps and core muscles, and can be done anywhere with no equipment needed. However, if you're looking to take your push up game to the next level, you may want to try incline diamond push ups.

What Are Incline Diamond Push Ups?
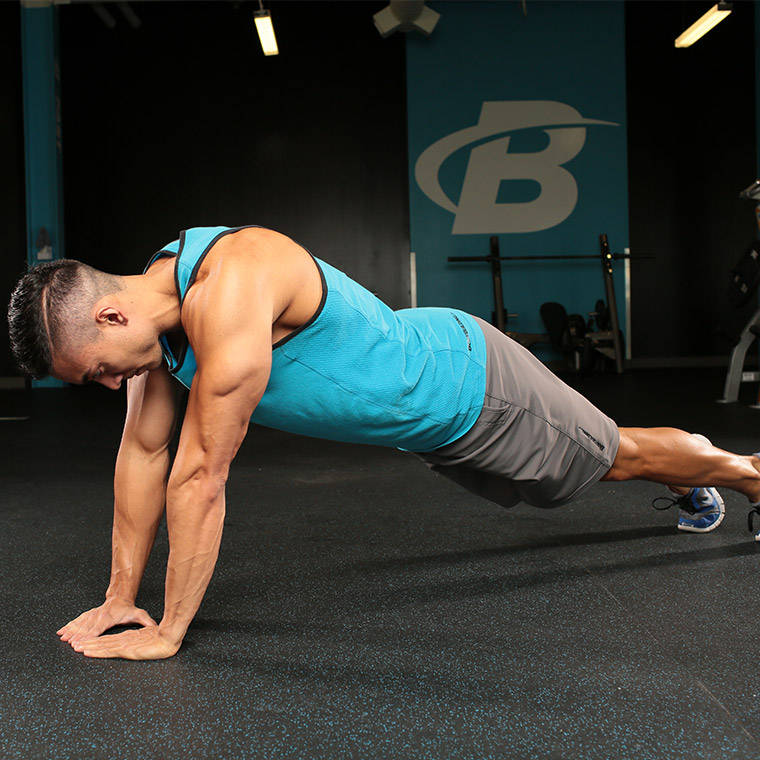
Incline diamond push ups are a variation of the traditional push up, where the hands are placed closer together in a diamond shape, and the feet are elevated on a bench, chair or other elevated surface. This change in hand placement and angle of the body puts more emphasis on the triceps and inner chest muscles, making it a challenging but effective exercise.

Benefits of Incline Diamond Push Ups
Incline diamond push ups offer several benefits over traditional push ups. First, they target the triceps and inner chest muscles more intensely, which can help to build strength and definition in these areas. Second, the elevated position of the feet increases the range of motion, making the exercise more challenging and effective. Finally, incline diamond push ups can also help to improve posture and stabilize the core muscles.

How to Do Incline Diamond Push Ups
To do incline diamond push ups, you will need an elevated surface such as a bench, chair or step. Here are the steps:
- Place your hands close together in a diamond shape on the elevated surface.
- Place your feet on the floor behind you, with your body in a straight line from head to heels.
- Lower your body down towards the bench, keeping your elbows close to your sides.
- Push back up to the starting position, squeezing your triceps and chest muscles.
- Repeat for the desired number of reps.
As you get stronger, you can increase the difficulty by using a lower bench or chair, or by adding weight to your back.

Tips for Doing Incline Diamond Push Ups
Here are some tips to help you do incline diamond push ups correctly:
- Keep your elbows close to your sides throughout the movement.
- Squeeze your triceps and chest muscles at the top of the movement.
- Keep your core muscles engaged to maintain good posture.
- Breathe in as you lower down, and exhale as you push back up.
Remember to start with a lower bench or chair if you're new to this exercise, and gradually increase the difficulty as you get stronger.
Conclusion
Incline diamond push ups are a challenging but effective exercise for building upper body strength and definition. They target the triceps and inner chest muscles more intensely than traditional push ups, and can help to improve posture and core stability. If you're looking to take your push up game to the next level, give incline diamond push ups a try!
Related video of Incline Diamond Push Ups: The Ultimate Upper Body Workout

The alternating dumbbell bench press is a popular exercise that can help you build chest and arm strength. This exercise involves using dumbbells to perform a bench press, but instead of using both dumbbells at the same time, you alternate between the two. This exercise is great for anyone who wants to increase their upper body strength, including athletes, bodybuilders, and fitness enthusiasts.
The Benefits of Alternating Dumbbell Bench Press

One of the main benefits of the alternating dumbbell bench press is that it can help you build chest and arm strength. By alternating between the two dumbbells, you are able to work each side of your body independently, which can help you develop more balanced strength. This exercise can also help you improve your overall chest and arm size, as well as your muscular endurance.
In addition to building strength and size, the alternating dumbbell bench press can also help you improve your form and technique. Because you are using dumbbells instead of a barbell, you are able to perform the exercise with a more natural range of motion. This can help you avoid shoulder pain and other injuries that can occur when using a barbell.
How to Perform the Alternating Dumbbell Bench Press

To perform the alternating dumbbell bench press, follow these steps:
- Lie down on a flat bench with a dumbbell in each hand.
- Hold the dumbbells at shoulder level, with your palms facing forward.
- Slowly lower one dumbbell down to your chest, keeping your elbow close to your body.
- As you press the dumbbell back up, simultaneously lower the other dumbbell down to your chest.
- Continue alternating between the two dumbbells for the desired number of repetitions.
It's important to keep your elbows close to your body throughout the exercise to avoid shoulder pain and other injuries. You should also make sure to use a weight that you can handle with good form, and gradually increase the weight as you get stronger.
Variations of the Alternating Dumbbell Bench Press

There are several variations of the alternating dumbbell bench press that you can try to keep your workouts interesting and challenging. Here are a few examples:
- Incline alternating dumbbell bench press: Perform the exercise on an incline bench to target the upper chest muscles.
- Decline alternating dumbbell bench press: Perform the exercise on a decline bench to target the lower chest muscles.
- Single-arm alternating dumbbell bench press: Instead of using both dumbbells at the same time, perform the exercise with one arm at a time.
By incorporating these variations into your workouts, you can target different areas of your chest and arms, and keep your muscles guessing.
Conclusion
The alternating dumbbell bench press is a simple yet effective exercise that can help you build chest and arm strength. By incorporating this exercise into your workouts, you can improve your overall upper body strength, size, and endurance. Remember to use good form, gradually increase the weight, and try different variations to keep your workouts interesting and challenging.
Related video of Alternating Dumbbell Bench Press: An Effective Exercise for Building Chest and Arm Strength
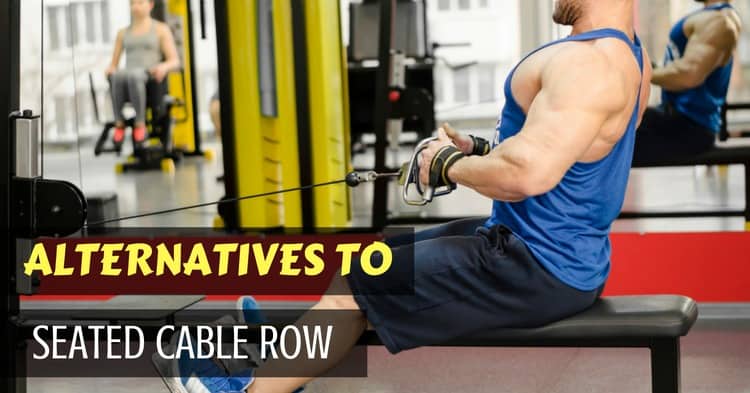
Seated cable rows are great exercises for building a strong back. However, doing the same exercise over and over again can get boring and may even lead to a plateau in your progress. Fortunately, there are several alternatives to seated cable rows that you can add to your workout routine to keep things fresh and challenge your muscles in new ways.
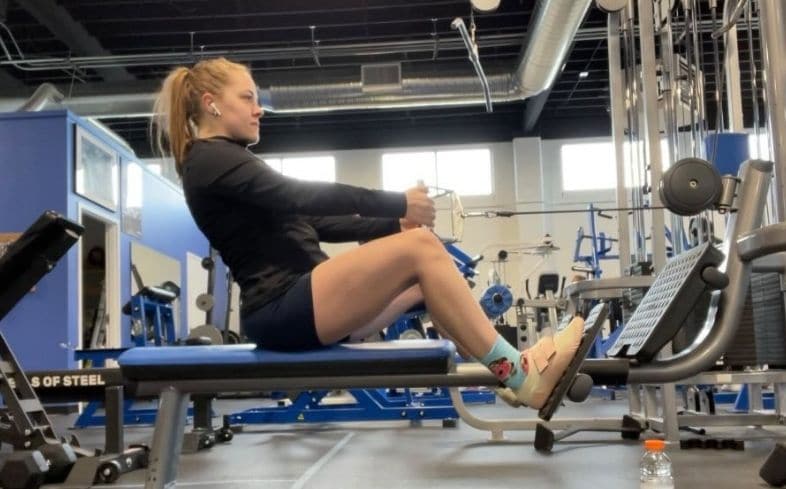
1. Dumbbell Rows

Dumbbell rows are a great alternative to seated cable rows because they work the same muscles but require more stabilization from your core. To do a dumbbell row, stand with your feet shoulder-width apart and hold a dumbbell in your right hand. Bend your knees slightly and hinge forward at your hips, keeping your back straight. Pull the dumbbell up to your chest, keeping your elbow close to your body. Lower the dumbbell back down and repeat on the other side.
2. Inverted Rows
Inverted rows are a bodyweight exercise that can be done using a barbell or a suspension trainer. To do an inverted row, lie underneath a barbell or suspension trainer with your hands shoulder-width apart. Pull your chest up to the bar or handles, keeping your elbows close to your body. Lower yourself back down and repeat.
3. T-Bar Rows

T-bar rows are a great alternative to seated cable rows because they allow you to use heavier weights and work your back muscles in a different angle. To do a T-bar row, stand with your feet shoulder-width apart and straddle a barbell. Bend your knees slightly and hinge forward at your hips, keeping your back straight. Grab the handles of the T-bar and pull it up to your chest, keeping your elbows close to your body. Lower the T-bar back down and repeat.
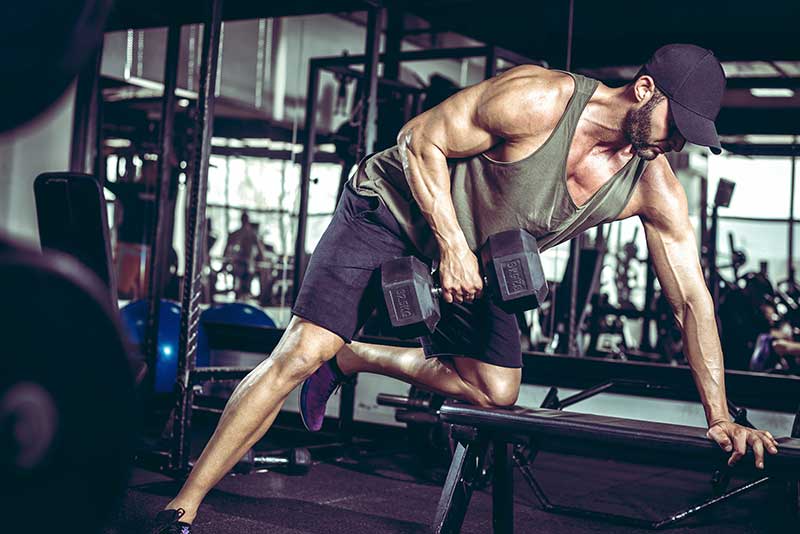
4. One-Arm Rows

One-arm rows are a great exercise for targeting your lats and upper back muscles. To do a one-arm row, place your left hand and left knee on a bench and hold a dumbbell in your right hand. Extend your right arm down towards the floor, then pull the dumbbell up to your chest, keeping your elbow close to your body. Lower the dumbbell back down and repeat on the other side.
5. Renegade Rows

Renegade rows are a challenging exercise that work your back and core muscles. To do a renegade row, start in a plank position with a dumbbell in each hand. Row one arm up to your chest while stabilizing with the other arm and your core. Lower the dumbbell back down and repeat on the other side.
6. Pull-Ups

Pull-ups are a classic exercise that work your back and arm muscles. To do a pull-up, grasp a pull-up bar with your palms facing away from your body and your hands shoulder-width apart. Pull your chest up to the bar, keeping your elbows close to your body. Lower yourself back down and repeat.
7. Chin-Ups
Chin-ups are similar to pull-ups but work your biceps more than your back muscles. To do a chin-up, grasp a pull-up bar with your palms facing towards your body and your hands shoulder-width apart. Pull your chest up to the bar, keeping your elbows close to your body. Lower yourself back down and repeat.
Conclusion
There are many great alternatives to seated cable rows that can help you build a strong back and challenge your muscles in new ways. By incorporating these exercises into your workout routine, you can keep things fresh and avoid hitting a plateau in your progress.
Related video of Seated Cable Rows Alternative

The physio ball roll out is an exercise that is perfect for anyone who wants to strengthen their core muscles. This exercise is great for people of all fitness levels, as it can be modified to suit your needs. In this article, we will take a closer look at the physio ball roll out, its benefits, and how to perform this exercise correctly.
What is a Physio Ball Roll Out?

The physio ball roll out is a variation of the traditional plank exercise that targets the core muscles. It involves using a physio ball to create instability and challenge your balance, which in turn works your core muscles harder. This exercise is also great for strengthening your upper body, particularly your shoulders and chest.
Benefits of the Physio Ball Roll Out

The physio ball roll out is a great exercise for strengthening your core muscles. These muscles are essential for maintaining good posture, balance, and stability. By improving your core strength, you can reduce your risk of injury and improve your overall fitness level. This exercise is also great for targeting your upper body muscles, particularly your shoulders and chest.
How to Perform a Physio Ball Roll Out

To perform a physio ball roll out, follow these steps:
- Start in a plank position with your forearms on a physio ball.
- Engage your core muscles and keep your back straight.
- Slowly roll the ball forward with your forearms until your body is fully extended.
- Hold the position for a few seconds, then slowly roll back to the starting position.
- Repeat for the desired number of repetitions.
Variations of the Physio Ball Roll Out

There are several variations of the physio ball roll out that you can try to make the exercise more challenging or to target different muscle groups. Here are a few examples:
- Single-arm physio ball roll out: Perform the exercise with one arm while keeping the other arm behind your back.
- Kneeling physio ball roll out: Perform the exercise while kneeling on the floor instead of in a plank position.
- Physio ball pike: Perform the exercise by rolling the ball forward and lifting your hips up into a pike position.
Tips for Performing a Physio Ball Roll Out

Here are a few tips to help you perform a physio ball roll out effectively:
- Engage your core muscles throughout the exercise to maintain good posture and stability.
- Keep your back straight and avoid arching or rounding your spine.
- Move slowly and avoid jerky movements to maintain control.
- Breathe deeply throughout the exercise to help you maintain focus and control.
Conclusion
The physio ball roll out is a great exercise for strengthening your core muscles and improving your overall fitness level. By incorporating this exercise into your workout routine, you can reduce your risk of injury and improve your balance and stability. Remember to start slowly and gradually build up your strength and endurance, and always listen to your body. Happy exercising!
Related video of Physio Ball Roll Out: A Great Exercise for a Stronger Core

Ez bar skull crushers are a popular exercise that targets the triceps muscles. It is an effective way to increase strength and size in the arms, and is often used by bodybuilders and fitness enthusiasts alike. In this article, we will discuss everything you need to know about ez bar skull crushers, from how to perform the exercise to its benefits and variations.
What are Ez Bar Skull Crushers?

Ez bar skull crushers, also known as lying triceps extensions, are a variation of the traditional triceps extension exercise. The ez bar, which is a curved barbell, is used instead of a straight barbell or dumbbells. The exercise involves lying on a bench with the ez bar held above the head, and then lowering the bar towards the forehead.
How to Perform Ez Bar Skull Crushers

To perform ez bar skull crushers:
- Lie on a bench with feet flat on the floor and the ez bar held with an overhand grip.
- Extend arms straight above the chest.
- Slowly lower the bar towards the forehead, keeping elbows stationary.
- Pause at the bottom of the movement, then press the bar back up to the starting position.
Repeat for desired number of repetitions.
Benefits of Ez Bar Skull Crushers

Ez bar skull crushers offer several benefits:
- Triceps isolation: The exercise targets the triceps muscles specifically, making it a great exercise for building triceps strength and size.
- Increased range of motion: The use of the ez bar allows for a greater range of motion compared to other triceps extension exercises.
- Variation: Ez bar skull crushers offer a variation to traditional triceps extension exercises, which can help prevent boredom and plateaus in training.
Common Mistakes to Avoid

Some common mistakes to avoid when performing ez bar skull crushers include:
- Allowing elbows to flare out: This puts unnecessary stress on the shoulders and reduces the effectiveness of the exercise.
- Lowering the bar too quickly: This can cause injury to the forehead or face.
- Using too much weight: This can lead to poor form and increased risk of injury.
Ez Bar Skull Crusher Variations

There are several variations of ez bar skull crushers, including:
- Cable ez bar skull crushers
- Close grip bench press
- Reverse grip ez bar skull crushers
- Single-arm ez bar skull crushers
When to Incorporate Ez Bar Skull Crushers into Your Workout Routine

Ez bar skull crushers can be incorporated into your workout routine as a main exercise for triceps, or as an accessory exercise for upper body workouts. It is recommended to perform 3-4 sets of 8-12 repetitions with moderate weight.
Conclusion
Ez bar skull crushers are an effective exercise for building strength and size in the triceps muscles. By incorporating this exercise into your workout routine, you can improve your upper body strength and achieve your fitness goals faster.
Related video of Ez Bar Skull Crushers: The Ultimate Guide

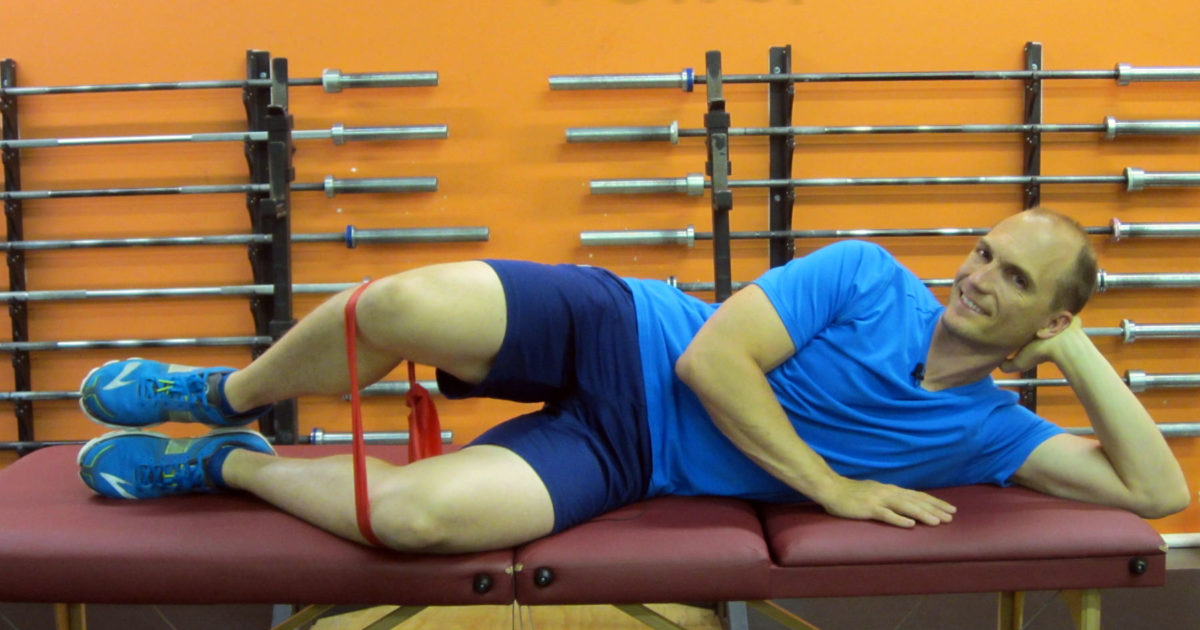
If you're looking for a simple, yet effective workout to strengthen your hips, thighs, and buttocks, then the clamshell exercise is for you. This exercise is named after the motion of a clamshell opening and closing, and it targets the muscles in your glutes and hips.
How to Do a Clamshell Exercise
The clamshell exercise is easy to perform, and it can be done at home or at the gym. Here's how to do a clamshell exercise:
- Lie on your side with your legs bent at a 90-degree angle and your feet together.
- Keeping your feet together, lift your top knee as high as you can without moving your pelvis.
- Lower your knee back down to the starting position.
- Repeat for 10-15 reps on each side, or until you feel a burn in your glutes and hips.
As you get stronger, you can add resistance by using a resistance band or ankle weights. This will make the exercise more challenging and help you build more strength.
Benefits of Clamshell Exercise

The clamshell exercise has several benefits, including:
- Strengthening the muscles in your hips, thighs, and buttocks.
- Improving your balance and stability.
- Reducing your risk of injury.
- Helping you maintain good posture.
- Improving your overall fitness level.
By incorporating the clamshell exercise into your workout routine, you can improve your overall health and fitness.
Common Mistakes to Avoid

While the clamshell exercise is easy to perform, there are some common mistakes that you should avoid to get the most out of your workout.
- Avoid lifting your feet off the ground or moving your pelvis during the exercise.
- Don't rush through the exercise - take your time and focus on using your glutes and hips to lift your knee.
- Avoid using momentum to lift your knee - make sure you're using your muscles to perform the movement.
- Don't hold your breath - remember to breathe normally throughout the exercise.
By avoiding these common mistakes, you can ensure that you're getting the most out of your clamshell exercise.
Other Exercises to Try

If you're looking to strengthen your hips, thighs, and buttocks, there are several other exercises that you can try in addition to the clamshell exercise.
- Squats
- Lunges
- Deadlifts
- Step-ups
- Bridges
By incorporating these exercises into your workout routine, you can build more strength and improve your overall fitness level.
Conclusion
The clamshell exercise is a simple yet effective exercise that can help you build strength in your hips, thighs, and buttocks. By performing this exercise regularly, you can improve your balance, reduce your risk of injury, and maintain good posture. So, if you're looking for a quick and easy way to get in shape, give the clamshell exercise a try!
