Hamstrings are an important muscle group in the body that help us perform daily activities such as walking, running, and jumping. They also play a vital role in sports such as football, basketball, and track and field. If you want to strengthen your hamstrings and improve your overall fitness, then exercise ball hamstring curls are a great way to achieve your goals.
What are Exercise Ball Hamstring Curls?

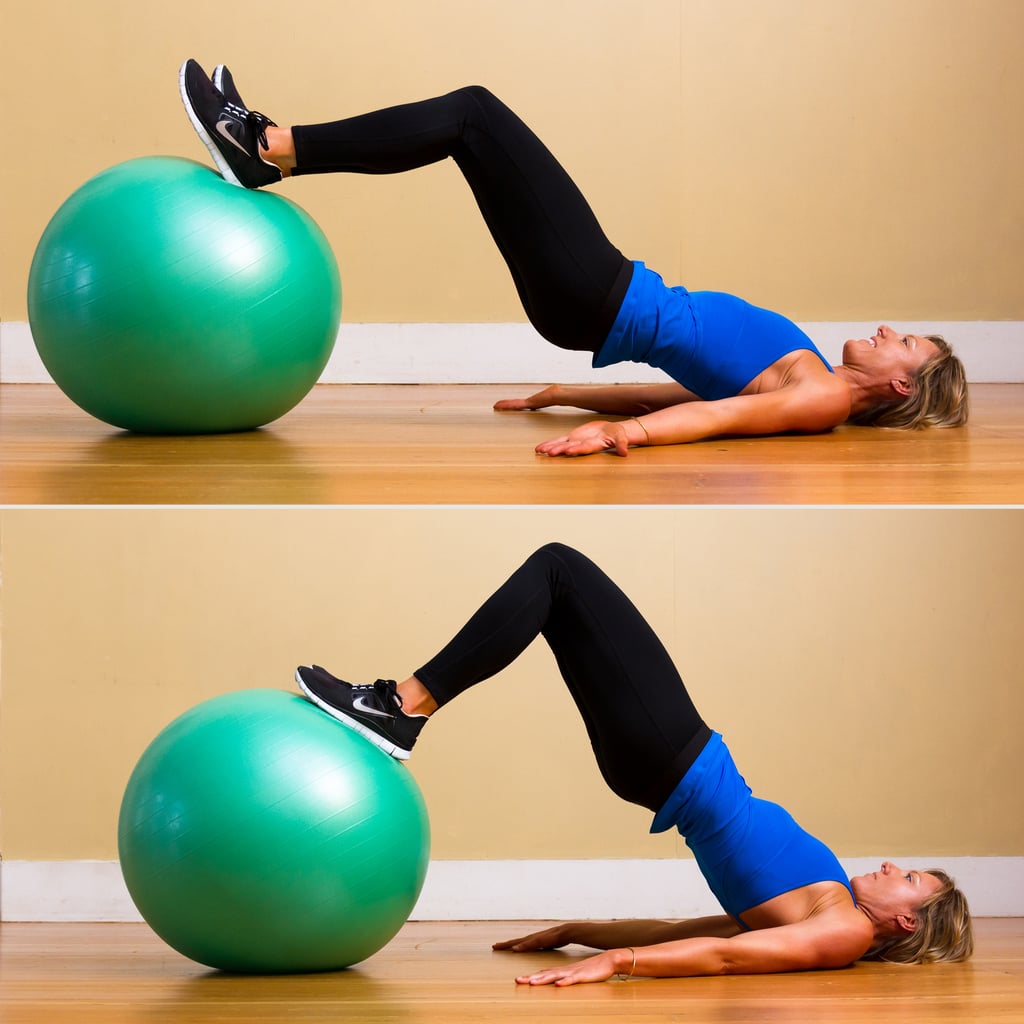
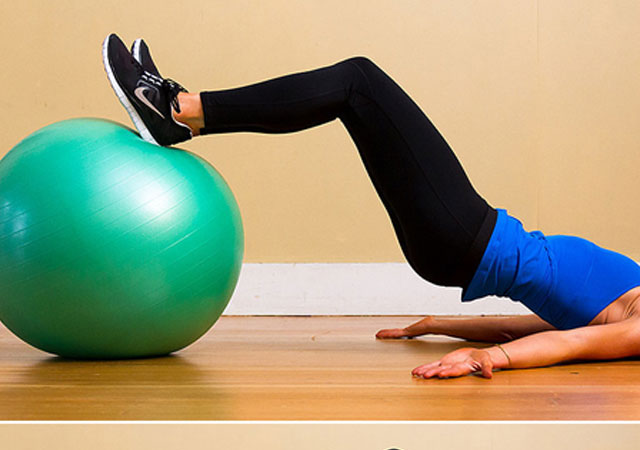
Exercise ball hamstring curls are a type of exercise that target your hamstring muscles. It involves lying on your back with your feet on an exercise ball, and then lifting your hips off the ground while pulling the ball towards your buttocks. This movement is repeated for several repetitions to strengthen and tone your hamstrings.
Benefits of Exercise Ball Hamstring Curls
There are several benefits of doing exercise ball hamstring curls:
- Strengthening your hamstrings
- Improving your balance and stability
- Reducing the risk of injury to your lower back
- Toning your legs and buttocks
- Burning calories and losing weight
How to Do Exercise Ball Hamstring Curls

Here are the steps to perform exercise ball hamstring curls:
- Lie on your back with your arms at your sides and your feet on an exercise ball.
- Lift your hips off the ground and contract your hamstrings.
- Pull the ball towards your buttocks using your feet.
- Slowly roll the ball back to the starting position.
- Repeat for several repetitions.
Variations of Exercise Ball Hamstring Curls

There are several variations of exercise ball hamstring curls that you can try to add variety to your workout:
- Single-leg exercise ball hamstring curls
- Reverse exercise ball hamstring curls
- Stability ball hamstring curls
- Weighted exercise ball hamstring curls
Tips for Doing Exercise Ball Hamstring Curls

Here are some tips for doing exercise ball hamstring curls:
- Start with a light weight exercise ball and gradually increase the weight as you get stronger.
- Engage your core muscles to keep your body stable throughout the exercise.
- Breathe out as you lift your hips off the ground and pull the ball towards your buttocks.
- Breathe in as you roll the ball back to the starting position.
- Don't arch your lower back or let your hips drop during the exercise.
Conclusion
Exercise ball hamstring curls are a great way to strengthen your hamstrings, improve your balance and stability, and tone your legs and buttocks. By following the steps and tips provided in this article, you can safely and effectively perform this exercise to achieve your fitness goals.
Related video of Exercise Ball Hamstring Curls: A Great Way to Strengthen Your Hamstrings
Are you looking for an effective core exercise that can help strengthen your abs, obliques, and lower back muscles? Look no further than the Russian twist! This exercise is simple to perform and can be done anywhere, making it a great addition to your workout routine. In this article, we will walk you through the steps to performing the Russian twist correctly.
What is the Russian Twist?

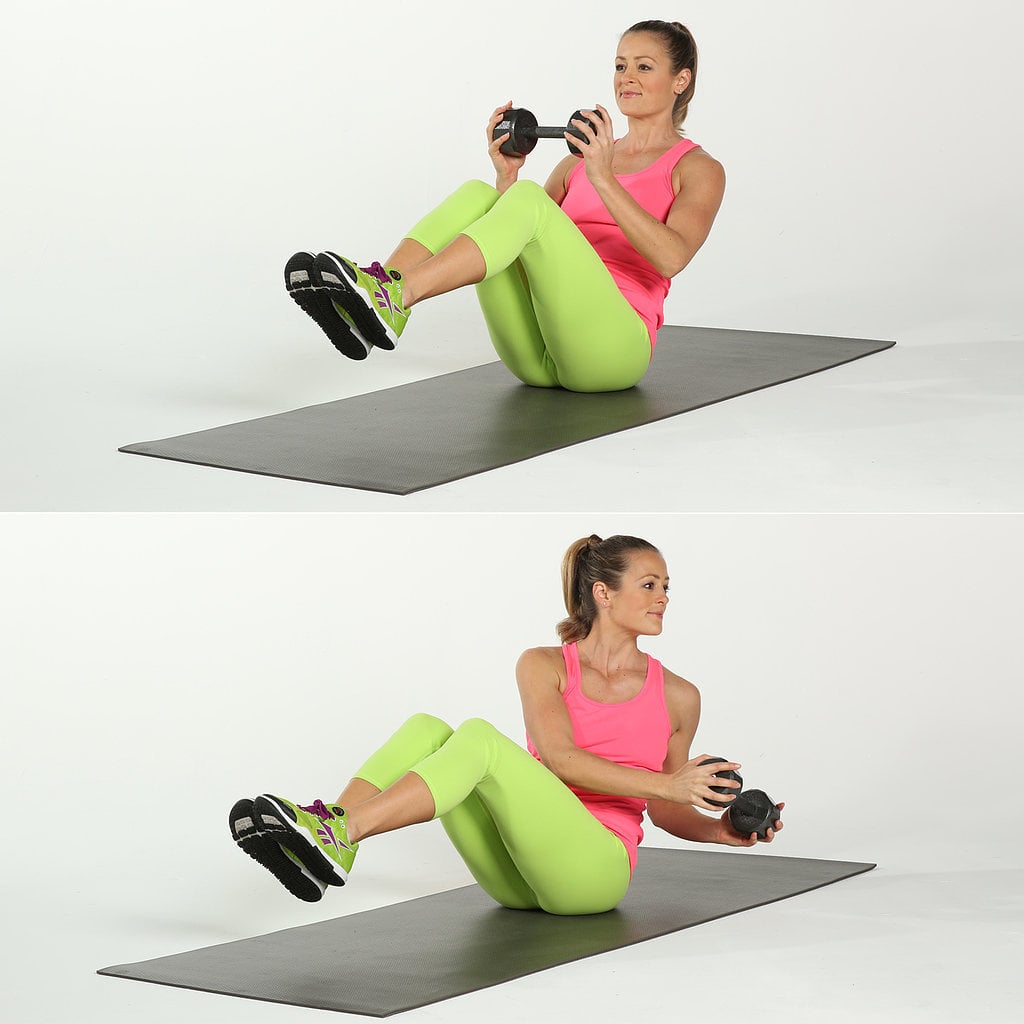
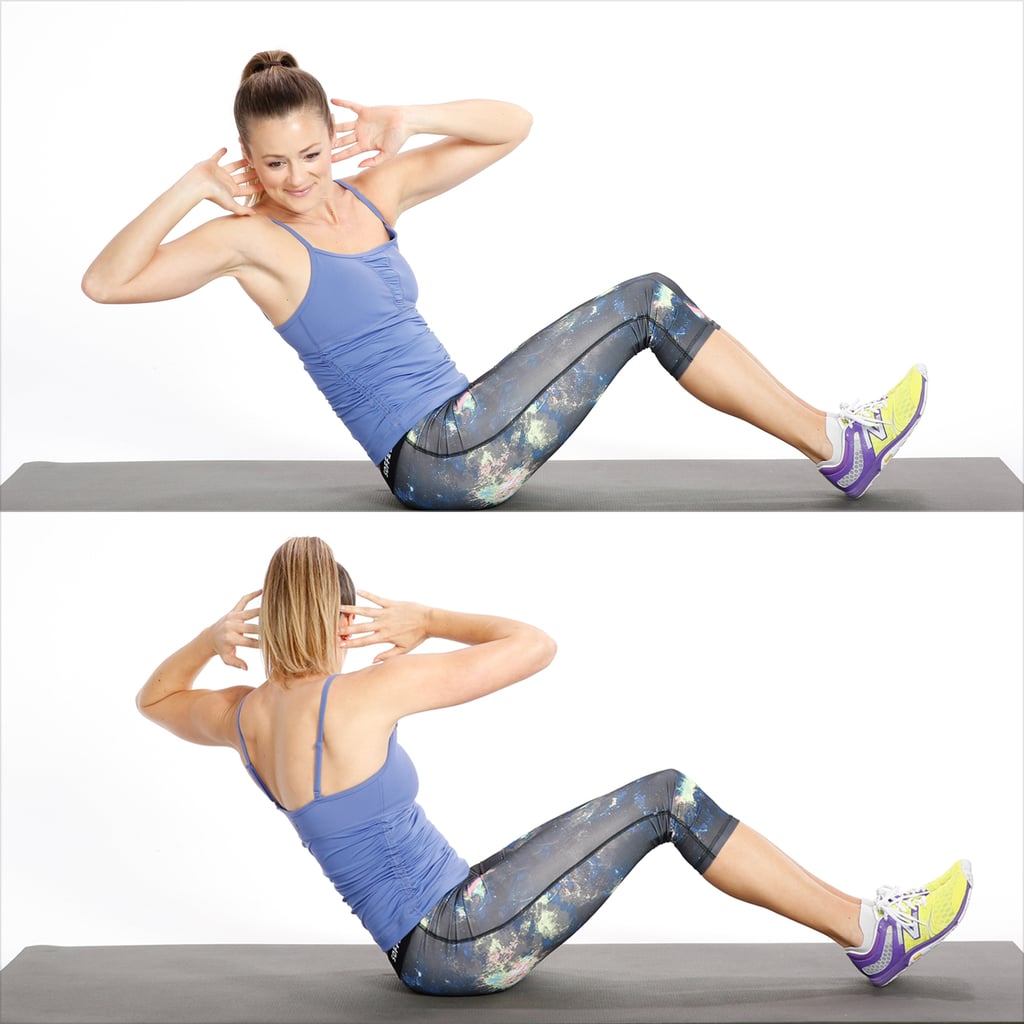
The Russian twist is a core exercise that targets the abs and obliques. It involves rotating the torso while holding a weight or medicine ball. The exercise is named after the Russian wrestlers who used it to develop their core strength and stability.
How to Perform the Russian Twist
Follow these steps to perform the Russian twist:
- Sit on the floor with your knees bent and your feet flat on the ground.
- Lean back slightly, keeping your back straight and your core engaged.
- Hold a weight or medicine ball with both hands, arms extended in front of you.
- Twist your torso to the right, bringing the weight or ball towards your right hip.
- Pause briefly, then twist your torso to the left, bringing the weight or ball towards your left hip.
- Repeat for the desired number of reps.
Tips for Proper Form
To get the most out of the Russian twist, it's important to maintain proper form. Here are some tips:
- Keep your feet flat on the ground and your knees bent throughout the exercise.
- Engage your core muscles to stabilize your spine.
- Keep your back straight and avoid rounding your shoulders.
- Twist your torso from your waist, not your shoulders.
- Exhale as you twist and inhale as you return to the starting position.
Variations of the Russian Twist
The Russian twist can be modified to suit your fitness level and goals. Here are some variations:
- Beginner: Perform the exercise without a weight or medicine ball.
- Intermediate: Hold a light weight or medicine ball.
- Advanced: Hold a heavier weight or medicine ball and lift your feet off the ground.
Benefits of the Russian Twist

The Russian twist offers several benefits:
- Strengthens the abs and obliques
- Improves core stability and balance
- Enhances rotational power and agility
- Can be done anywhere with minimal equipment
Precautions
While the Russian twist is generally safe for most people, it may not be suitable for those with certain conditions. If you have any of the following, consult your doctor before performing the exercise:
- Back pain or injury
- Spinal conditions
- Balance issues
Incorporating the Russian Twist into Your Workout
The Russian twist can be incorporated into your workout in several ways:
- As a standalone exercise: Perform 2-3 sets of 10-15 reps, resting for 30 seconds between sets.
- In a circuit: Include the Russian twist as one of several exercises in a circuit, performing each exercise for 30-60 seconds before moving on to the next.
- As part of a warm-up: Perform a few reps of the Russian twist to activate your core muscles before your workout.
Conclusion
The Russian twist is a simple yet effective exercise that can help strengthen your abs, obliques, and lower back muscles. By following proper form and incorporating variations into your routine, you can reap the benefits of this exercise and achieve a stronger, more stable core.
Related video of How to Russian Twist: A Step-by-Step Guide
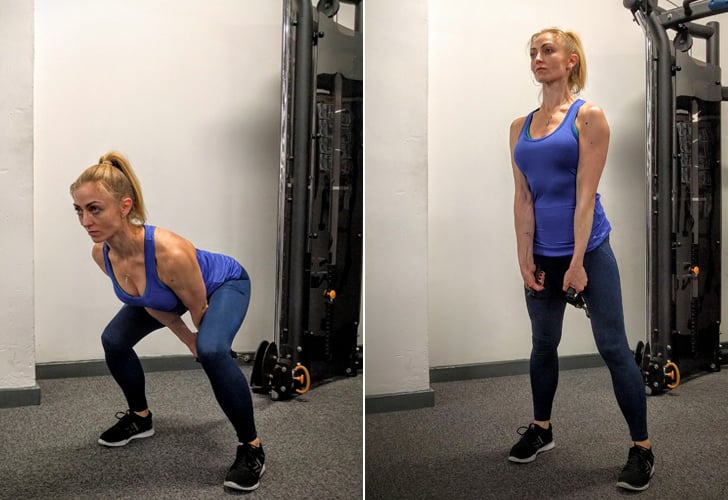
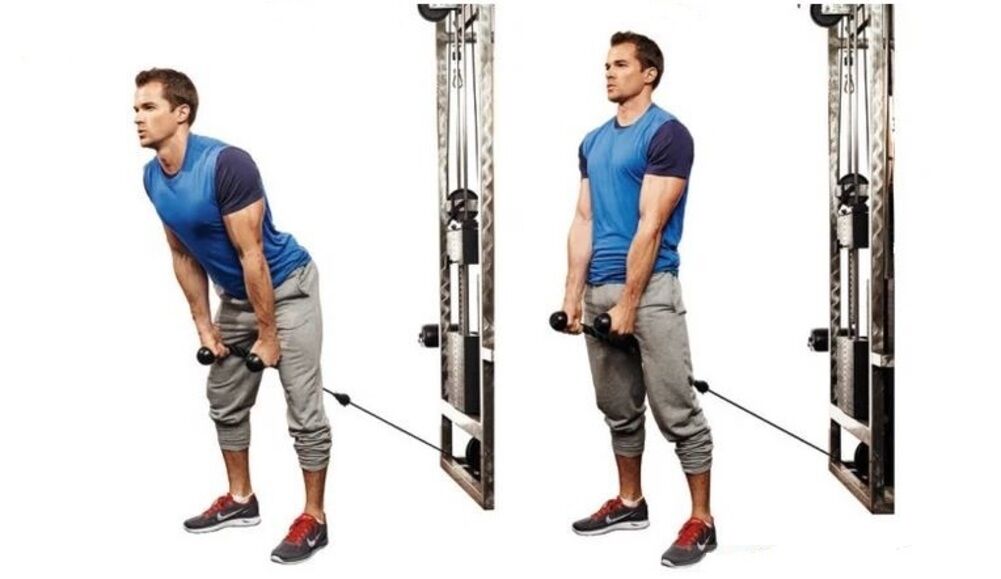
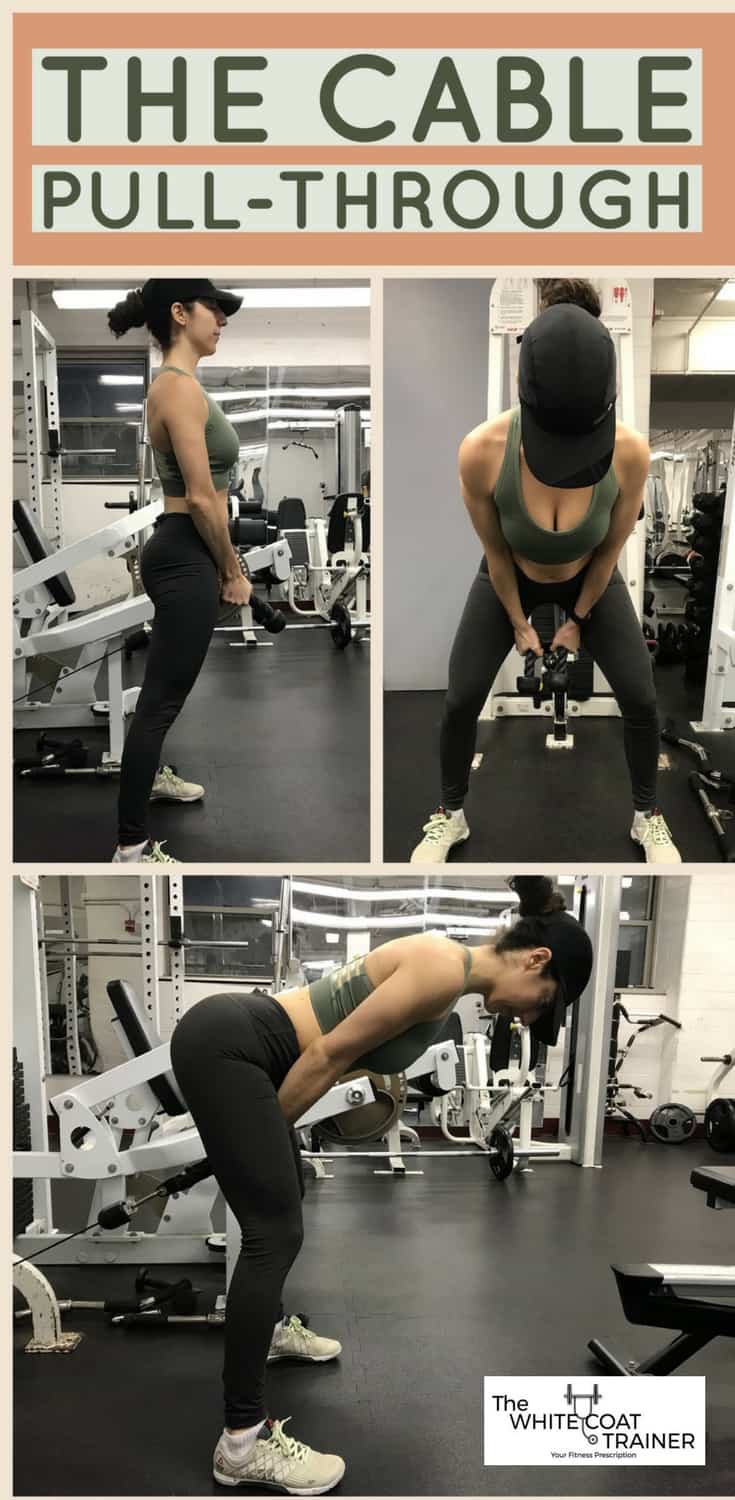
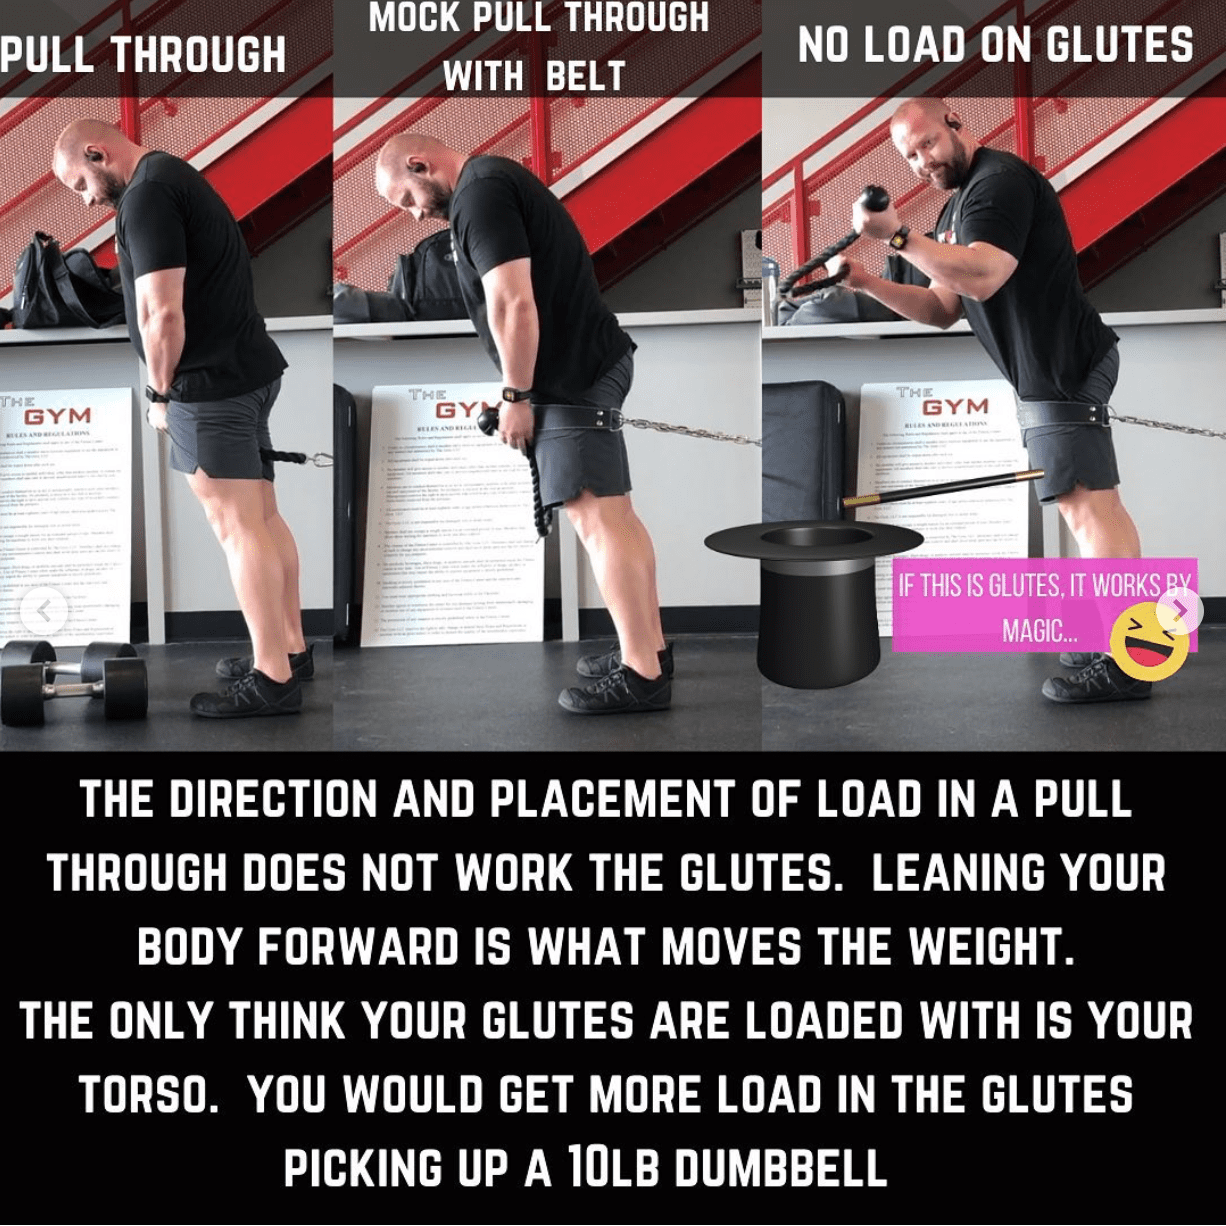
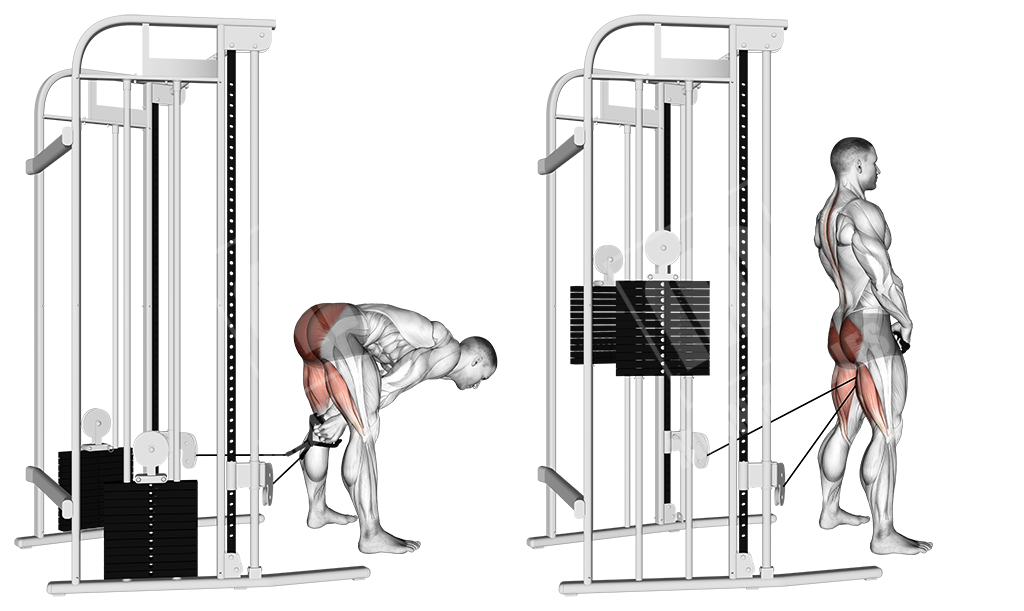
The Glute Cable Pull Through is a popular exercise in the fitness industry. This exercise targets the glutes, hamstrings, and lower back muscles. It's a compound exercise that increases strength, power, and endurance in the lower body.
How to Perform Glute Cable Pull Through?
Here's how to perform the Glute Cable Pull Through:
- Stand facing away from the cable machine with your feet shoulder-width apart.
- Attach the rope to the cable machine and hold it between your legs.
- Bend your hips backward and lower your torso until it's parallel to the floor.
- Keep your back straight and core engaged.
- Extend your hips forward and stand back up to the starting position.
- Repeat for the desired number of repetitions.
Make sure to keep your knees slightly bent throughout the exercise.
Benefits of Glute Cable Pull Through

The Glute Cable Pull Through has several benefits:
- It targets the glutes, hamstrings, and lower back muscles.
- It improves hip mobility and flexibility.
- It increases strength, power, and endurance in the lower body.
- It's a compound exercise that burns more calories than isolation exercises.
- It's a low-impact exercise that's easy on the joints.
Variations of Glute Cable Pull Through
Here are some variations of the Glute Cable Pull Through:
- Single-leg Glute Cable Pull Through: Perform the exercise with one leg at a time.
- Wide Stance Glute Cable Pull Through: Stand with your feet wider than shoulder-width apart.
- Reverse Grip Glute Cable Pull Through: Hold the rope with an underhand grip.
Common Mistakes to Avoid
Here are some common mistakes to avoid while doing the Glute Cable Pull Through:
- Arching your back: Keep your back straight throughout the exercise.
- Rounding your shoulders: Keep your shoulders back and down.
- Bending your knees too much: Keep your knees slightly bent.
- Using too much weight: Start with a light weight and progress gradually.
- Moving too fast: Control the movement and focus on the muscles being worked.
Sample Workout Routine
Here's a sample workout routine that includes the Glute Cable Pull Through:
- Warm-up: 10 minutes of cardio and dynamic stretching.
- Glute Cable Pull Through: 3 sets of 12-15 repetitions.
- Barbell Deadlift: 3 sets of 8-10 repetitions.
- Lunges: 3 sets of 12-15 repetitions per leg.
- Leg Press: 3 sets of 10-12 repetitions.
- Cool-down: 5 minutes of static stretching.
Conclusion
The Glute Cable Pull Through is a great exercise to target the glutes, hamstrings, and lower back muscles. It's a compound exercise that increases strength, power, and endurance in the lower body. By avoiding common mistakes and incorporating variations, you can maximize the benefits of this exercise. Add the Glute Cable Pull Through to your workout routine and feel the burn!
Related video of Glute Cable Pull Through: A Comprehensive Guide

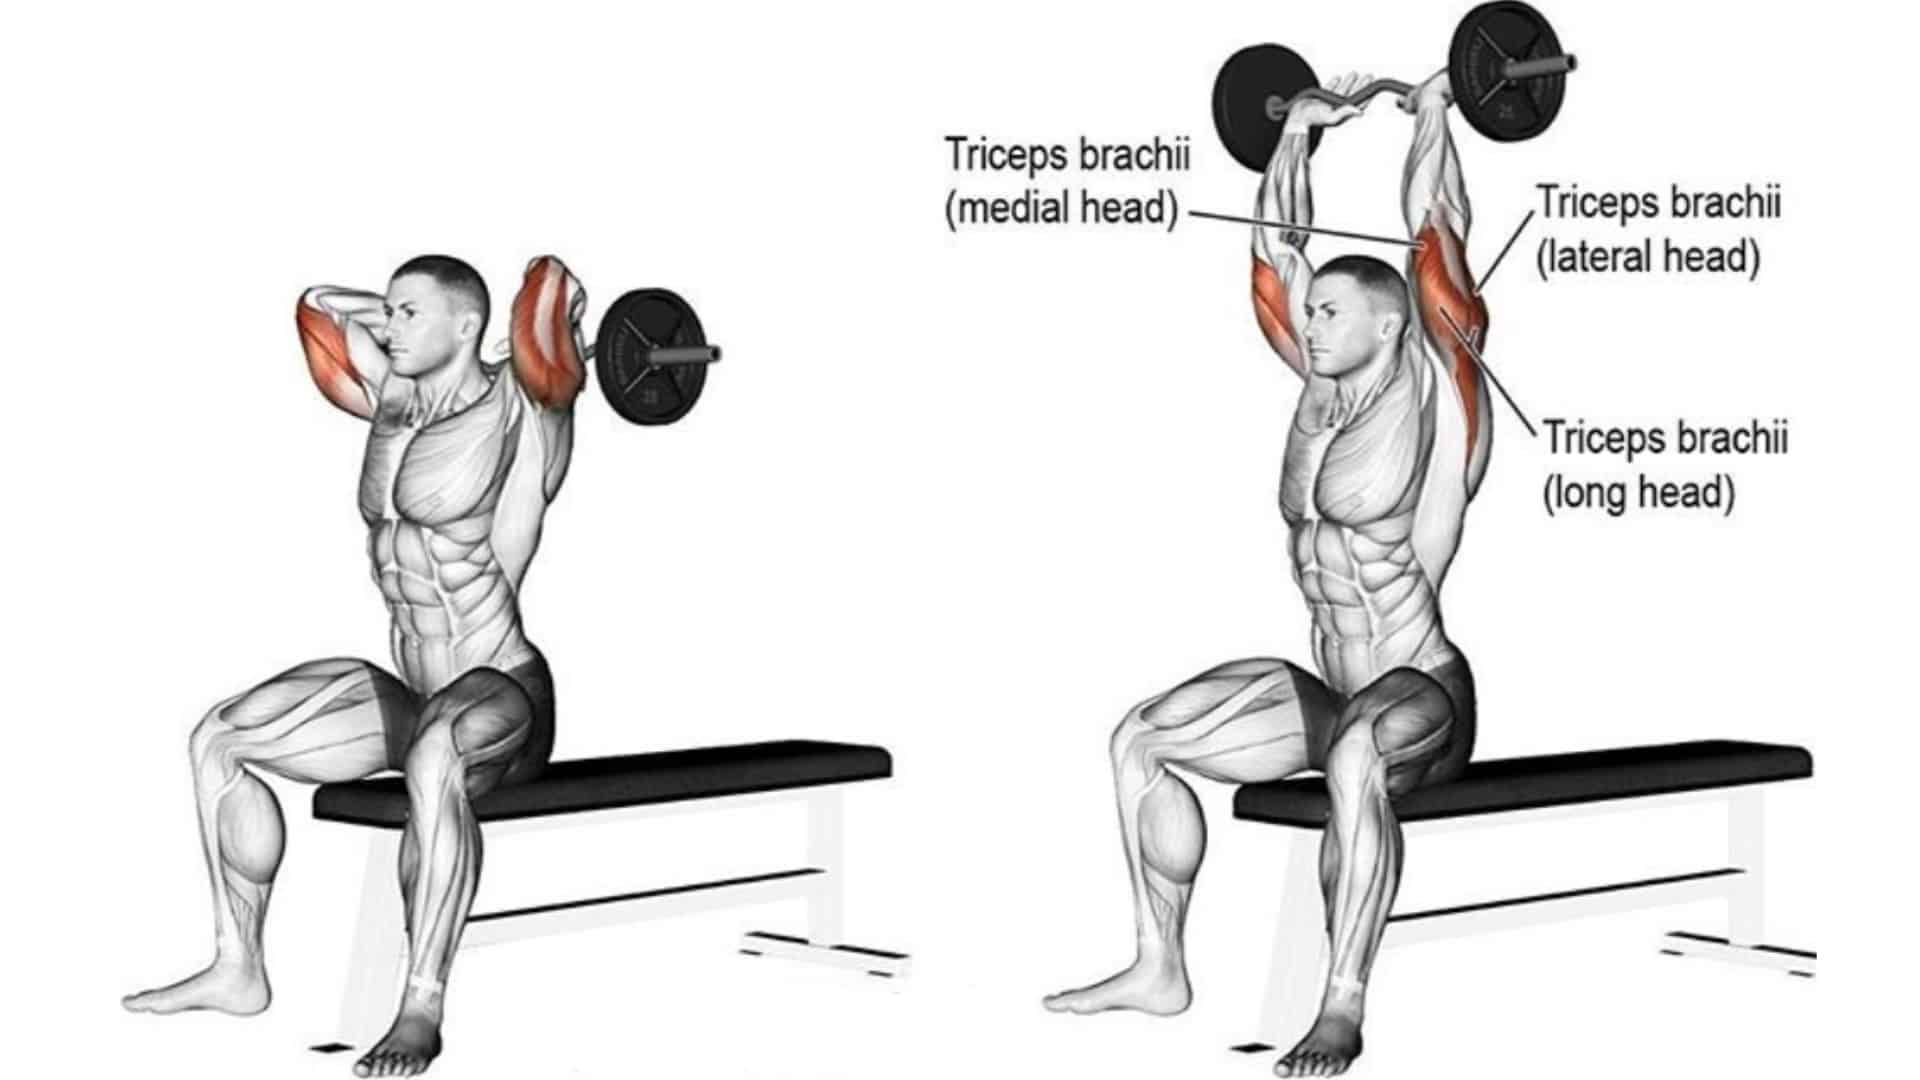
When it comes to building muscle and strength in your arms, triceps exercises are essential. One of the most effective triceps exercises is the overhead triceps extension barbell. This exercise targets the triceps muscles and can help you develop stronger and more defined arms.
How to Perform Overhead Triceps Extension Barbell

To perform the overhead triceps extension barbell, follow these steps:
- Stand with your feet shoulder-width apart and hold a barbell with an overhand grip.
- Lift the barbell over your head and extend your arms straight up.
- Slowly lower the barbell behind your head, keeping your elbows close to your head.
- Pause for a moment and then lift the barbell back up to the starting position.
- Repeat for the desired number of repetitions.
It's important to use a weight that you can control and to avoid swinging the barbell. Keep your elbows close to your head throughout the movement and focus on using your triceps muscles to lift the weight.
Variations of Overhead Triceps Extension Barbell
There are several variations of overhead triceps extension barbell that you can try to add variety to your workout:
- Single Arm Overhead Triceps Extension - Hold a dumbbell in one hand and lift it overhead, then bend your elbow and lower the weight behind your head.
- Cable Overhead Triceps Extension - Use a cable machine to perform the exercise, standing with your back to the machine and holding the handle with both hands.
- Reverse Grip Overhead Triceps Extension - Hold the barbell with an underhand grip and lift it over your head, then lower it behind your head.
Each variation targets the triceps muscles in a slightly different way and can help you avoid getting bored with your workout routine.
Tips for Overhead Triceps Extension Barbell

Here are some tips to keep in mind when performing the overhead triceps extension barbell:
- Warm up first - Do some light cardio or dynamic stretching to get your muscles warmed up before starting the exercise.
- Use proper form - Keep your back straight and your elbows close to your head throughout the movement.
- Breathe - Inhale as you lift the weight and exhale as you lower it.
- Start with light weights - If you're new to the exercise, start with a light weight and gradually increase as you become more comfortable.
- Don't overdo it - Avoid doing too many repetitions or using too heavy of a weight, which can lead to injury.
Benefits of Overhead Triceps Extension Barbell

There are several benefits to performing the overhead triceps extension barbell:
- Builds triceps strength - This exercise specifically targets the triceps muscles, helping to build strength and definition in your arms.
- Improves shoulder stability - Lifting the weight overhead requires shoulder stability, which can help improve your overall shoulder health.
- Works multiple muscle groups - The overhead triceps extension barbell also works your core, shoulders, and upper back muscles.
- Can be done at home or in the gym - This exercise can be done with a barbell or dumbbell and can be performed at home or in the gym.
In Conclusion
The overhead triceps extension barbell is one of the most effective exercises for building triceps strength and definition. By following proper form and gradually increasing weight and repetitions, you can see significant improvements in your arm strength and appearance. Remember to warm up properly and use proper form to avoid injury, and don't be afraid to try variations of the exercise to keep your workout routine fresh and challenging.
Related video of Overhead Triceps Extension Barbell

The hanging leg raise is a popular exercise that targets the lower abs, hip flexors, and obliques. It involves hanging from a bar and raising your legs until they are parallel to the ground. While it may seem like an easy exercise, it requires a lot of core strength and stability.
Why is the Hanging Leg Raise Important?

The hanging leg raise is important because it helps to strengthen the core muscles, which are essential for maintaining good posture, preventing lower back pain, and improving overall athletic performance. It also targets the hip flexors and obliques, which are often neglected in traditional ab exercises.
How to Perform a Hanging Leg Raise

To perform a hanging leg raise, follow these steps:
- Hang from a pull-up bar with your hands shoulder-width apart and your palms facing away from you.
- Engage your core muscles and lift your legs up until they are parallel to the ground.
- Hold this position for a few seconds before slowly lowering your legs back down to the starting position.
- Repeat for the desired number of reps.
Hanging Leg Raise Progression

If you are new to the hanging leg raise, it is important to start with the basic exercise and gradually work your way up to more advanced variations. Here are some hanging leg raise progressions:
1. Bent-Knee Leg Raise

The bent-knee leg raise is a great exercise for beginners or anyone who struggles with the full hanging leg raise. To perform this exercise, follow these steps:
- Hang from a pull-up bar with your hands shoulder-width apart and your palms facing away from you.
- Bend your knees and bring them up towards your chest.
- Hold this position for a few seconds before slowly lowering your legs back down to the starting position.
- Repeat for the desired number of reps.
2. Straight-Leg Raise

The straight-leg raise is a more advanced version of the hanging leg raise that requires greater core strength and flexibility. To perform this exercise, follow these steps:
- Hang from a pull-up bar with your hands shoulder-width apart and your palms facing away from you.
- Engage your core muscles and lift your legs up until they are straight and parallel to the ground.
- Hold this position for a few seconds before slowly lowering your legs back down to the starting position.
- Repeat for the desired number of reps.
3. Side-to-Side Leg Raise

The side-to-side leg raise is a variation of the hanging leg raise that targets the obliques. To perform this exercise, follow these steps:
- Hang from a pull-up bar with your hands shoulder-width apart and your palms facing away from you.
- Engage your core muscles and lift your legs up until they are parallel to the ground.
- Slowly lower your legs to one side, keeping them straight.
- Return to the starting position and repeat on the other side.
- Repeat for the desired number of reps.
Tips for Performing Hanging Leg Raises

Here are some tips to help you perform hanging leg raises safely and effectively:
- Keep your core muscles engaged throughout the exercise to prevent swinging.
- Avoid using momentum to lift your legs. Focus on using your core muscles instead.
- Breathe out as you lift your legs and breathe in as you lower them.
- Start with the basic exercise and gradually work your way up to more advanced variations.
- Don't overdo it. Start with a few reps and gradually increase the number as your core strength improves.
Conclusion
The hanging leg raise is a challenging exercise that targets the core muscles, hip flexors, and obliques. By following the hanging leg raise progression and incorporating it into your workout routine, you can improve your core strength, posture, and athletic performance. Remember to start with the basic exercise and gradually work your way up to more advanced variations. As with any exercise, it is important to perform hanging leg raises safely and effectively to avoid injury.
Related video of Hanging Leg Raise Progression

The rotator cuff is a group of muscles and tendons that surround and stabilize the shoulder joint. It plays a crucial role in shoulder movement and stability. Rotator cuff injuries are common, especially in athletes and people who perform repetitive overhead motions. Fortunately, there are several rotator cuff dumbbell exercises that can help strengthen these muscles and prevent injuries.
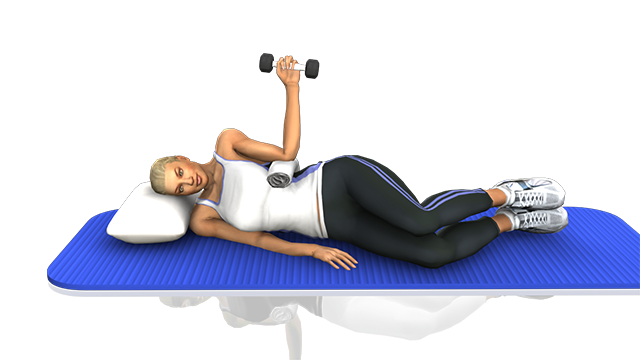
1. External Rotation

External rotation is an effective exercise that targets the rotator cuff muscles. Start by lying on your side with a dumbbell in your top hand. Keep your elbow bent and close to your side. Slowly raise the weight away from your body, keeping your elbow at a 90-degree angle. Lower the weight back down and repeat for several reps before switching sides.
2. Internal Rotation

Internal rotation is another exercise that targets the rotator cuff muscles. Sit on a bench with your arm resting on your thigh and a dumbbell in your hand. Keep your elbow bent and close to your side. Slowly rotate the weight towards your body, keeping your elbow at a 90-degree angle. Lower the weight back down and repeat for several reps before switching sides.
3. Scaption

Scaption is a shoulder exercise that targets the rotator cuff muscles as well as the deltoids. Stand with your feet shoulder-width apart and hold a dumbbell in each hand. Raise your arms out to the sides at a 45-degree angle, keeping your elbows slightly bent. Raise the weights up to shoulder level and then lower them back down. Repeat for several reps.
4. Shoulder Press

The shoulder press is a classic exercise that targets the deltoids but also works the rotator cuff muscles. Sit on a bench with a dumbbell in each hand. Raise the weights to shoulder level with your palms facing forward. Press the weights up and then lower them back down. Repeat for several reps.
5. YTWL
YTWL is a four-exercise sequence that targets the rotator cuff muscles and improves posture. Lie on your stomach with a light dumbbell in each hand. Start with your arms in a Y position, then move them to a T position, then a W position, and finally an L position. Repeat for several reps.
6. Reverse Fly

The reverse fly is an exercise that targets the rear deltoids and the rotator cuff muscles. Stand with your feet shoulder-width apart and hold a dumbbell in each hand. Bend forward at the hips, keeping your back straight. Raise your arms out to the sides, squeezing your shoulder blades together. Lower the weights back down and repeat for several reps.
7. Wall Angels
Wall angels are an exercise that targets the rotator cuff muscles and improves shoulder mobility. Stand with your back against a wall and your feet shoulder-width apart. Raise your arms up to shoulder level with your elbows bent and your palms facing forward. Slowly slide your arms up the wall and then back down. Repeat for several reps.
8. Cuban Press

The Cuban press is an exercise that targets the rotator cuff muscles and improves shoulder stability. Stand with your feet shoulder-width apart and hold a dumbbell in each hand. Raise the weights to shoulder level with your palms facing up. Rotate your wrists so that your palms are facing forward and then press the weights up. Rotate your wrists again so that your palms are facing down and then lower the weights back down. Repeat for several reps.
9. Lateral Raise

The lateral raise is an exercise that targets the deltoids but also works the rotator cuff muscles. Stand with your feet shoulder-width apart and hold a dumbbell in each hand. Raise the weights out to the sides to shoulder level and then lower them back down. Repeat for several reps.
10. Upright Row

The upright row is an exercise that targets the deltoids and the rotator cuff muscles. Stand with your feet shoulder-width apart and hold a dumbbell in each hand. Raise the weights up to your chin, keeping your elbows out to the sides. Lower the weights back down and repeat for several reps.
Conclusion
Rotator cuff dumbbell exercises are an effective way to strengthen your shoulder muscles and prevent injuries. By incorporating these exercises into your workout routine, you can improve your shoulder mobility, stability, and overall function. Remember to start with light weights and gradually increase as you get stronger. If you feel any pain or discomfort, stop the exercise and consult with a healthcare professional.
Related video of Rotator Cuff Dumbbell Exercises: Strengthen Your Shoulder Muscles

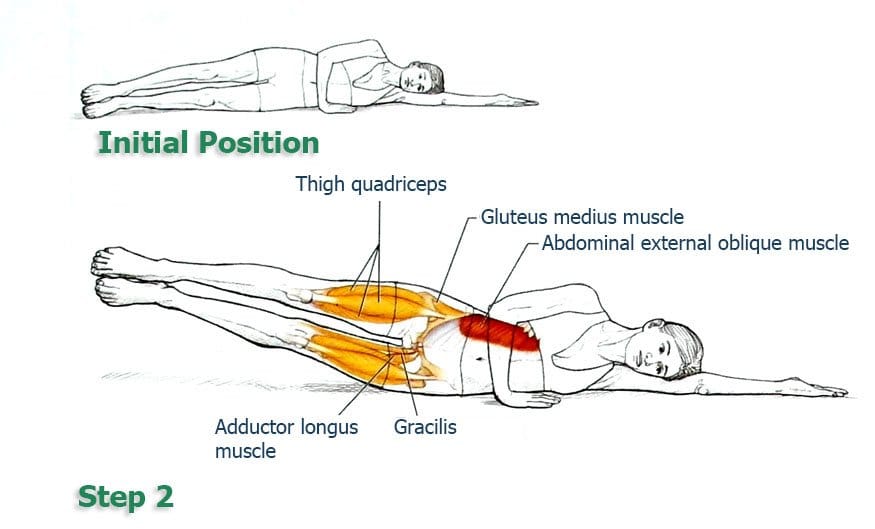
Side leg raises are a popular exercise that involve lifting the leg to the side while keeping the torso stable. This exercise is often used to strengthen the hip abductor muscles, which are responsible for moving the leg away from the body. In addition to the hip abductors, the side leg raise also works other muscles in the lower body, including the glutes and quadriceps.
Gluteus Medius

The gluteus medius is one of the primary muscles worked during the side leg raise exercise. This muscle is located on the side of the hip and is responsible for stabilizing the pelvis during movement. The gluteus medius is also important for maintaining proper alignment of the leg and preventing injuries such as knee valgus.
Tensor Fasciae Latae

The tensor fasciae latae is a small muscle located on the side of the hip. This muscle is responsible for abducting and flexing the hip, which makes it an important muscle worked during the side leg raise exercise. The tensor fasciae latae also helps to stabilize the knee joint during movement.
Gluteus Maximus

The gluteus maximus is the largest muscle in the body and is located in the buttocks. This muscle is responsible for extending and externally rotating the hip, which makes it an important muscle worked during the side leg raise exercise. In addition to these actions, the gluteus maximus also helps to stabilize the pelvis during movement.
Quadriceps

The quadriceps are a group of four muscles located on the front of the thigh. These muscles are responsible for extending the knee and are worked during the side leg raise exercise as the leg is lifted to the side. The quadriceps also help to stabilize the knee joint and prevent injuries.
How to Perform Side Leg Raises

To perform side leg raises, start by lying on your side with your legs straight and your head resting on your arm. Keeping your leg straight, lift it as high as you can without rotating your hip or bending your knee. Hold for a moment, then lower your leg back down. Repeat for the desired number of repetitions, then switch sides and repeat with the other leg.
Variations of Side Leg Raises

There are several variations of the side leg raise exercise that can be used to target different muscles in the lower body. One variation is the side lying clam, which involves keeping the knees bent and lifting the top leg while keeping the feet together. Another variation is the side plank with leg raise, which involves lifting the top leg while holding a side plank position.
Benefits of Side Leg Raises
Side leg raises are a great exercise for strengthening the lower body and improving overall fitness. Some of the benefits of this exercise include improved balance, increased hip strength and stability, and a toned lower body. Side leg raises can also be used to target specific muscles in the lower body, making them a versatile exercise for anyone looking to improve their fitness.
Conclusion
Side leg raises are a simple yet effective exercise that can be used to target multiple muscles in the lower body. By adding this exercise to your workout routine, you can improve your strength, stability, and overall fitness. Whether you're a beginner or an experienced athlete, side leg raises are a great addition to any workout program.
Related video of Side Leg Raises Muscles Worked

When it comes to working out, incorporating different types of equipment can help add variety and challenge to your routine. One piece of equipment that can make a big difference in your core workouts is the sit up medicine ball. This versatile piece of equipment can be used in a variety of exercises to help tone and strengthen your abs and other core muscles.
What is a Sit Up Medicine Ball?

A sit up medicine ball is a type of exercise ball that is specifically designed to assist you in sit up exercises. It is a weighted ball that provides resistance, making your sit ups more challenging and effective. The ball is typically between 4-12 pounds, depending on your fitness level and goals.
Benefits of Using a Sit Up Medicine Ball
Using a sit up medicine ball in your workouts can provide a variety of benefits, including:
- Increased core strength
- Better balance and stability
- Improved posture and spinal alignment
- Greater range of motion in your sit ups
- Added variety and challenge to your workouts
Exercises You Can Do with a Sit Up Medicine Ball

One of the great things about a sit up medicine ball is that it can be used in a variety of exercises, beyond just sit ups. Here are a few exercises you can try:
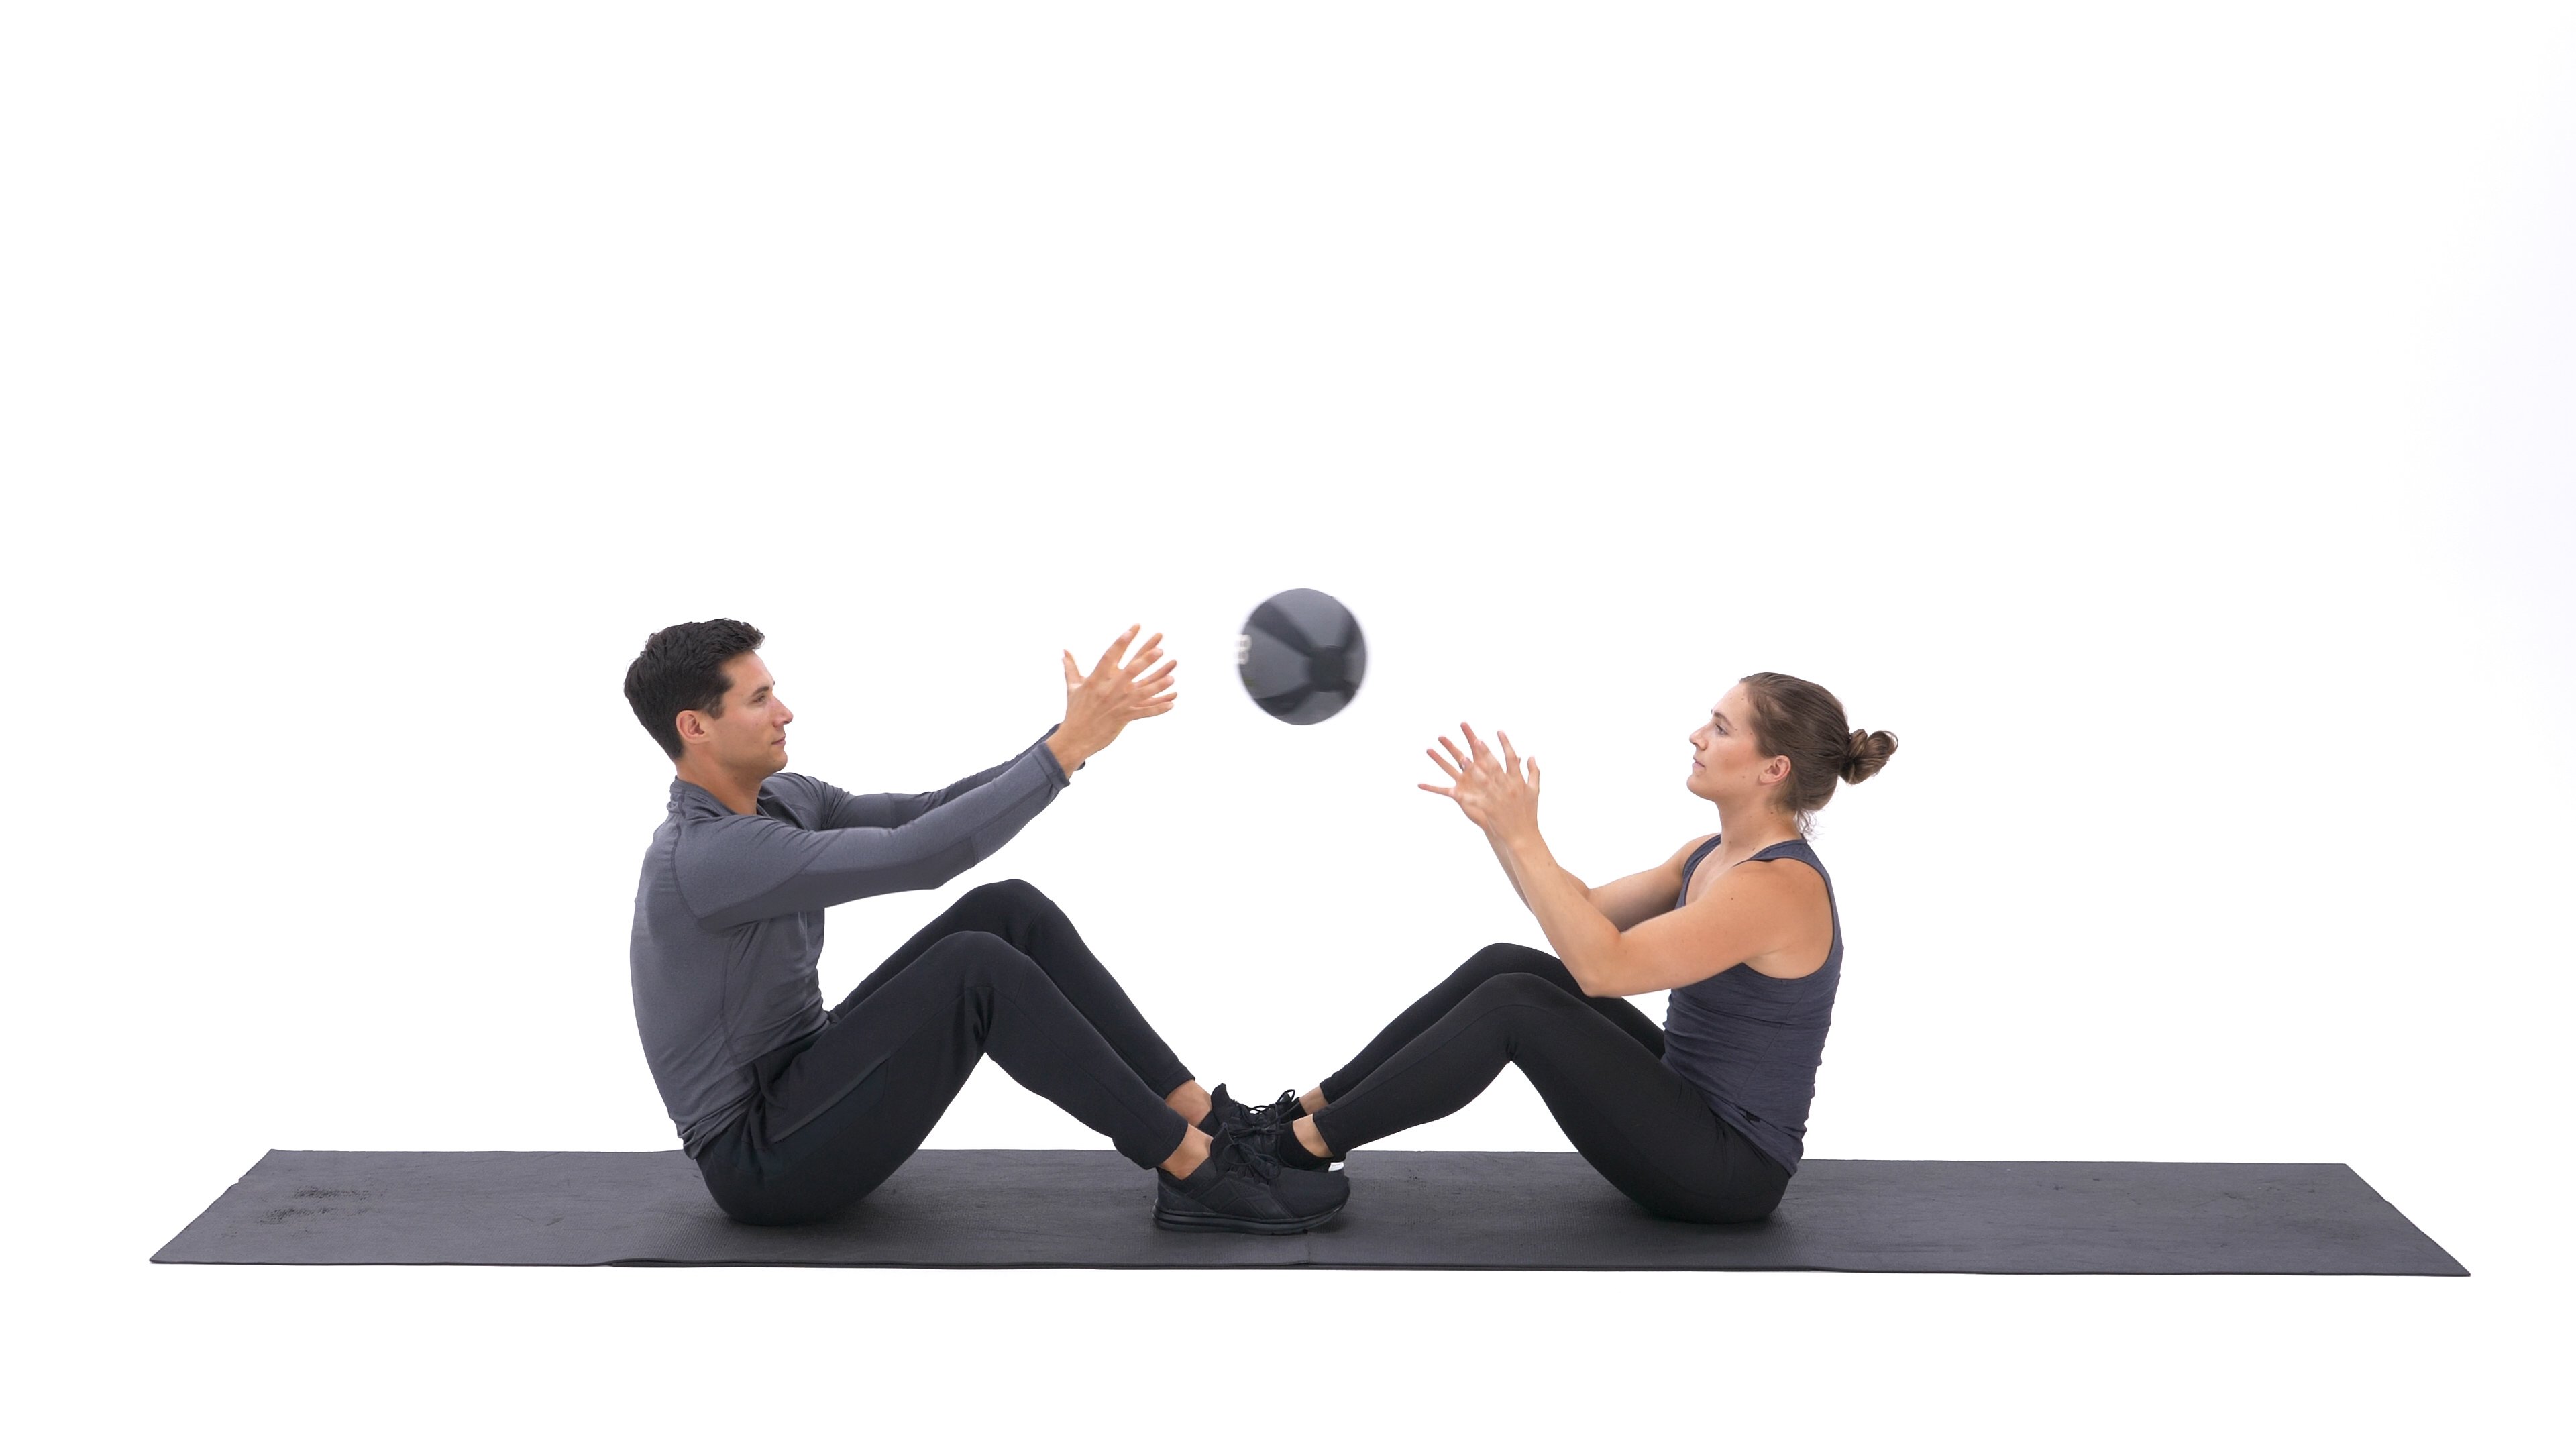
- Medicine Ball Sit Ups: Sit on the floor with your knees bent and feet flat on the ground. Hold the medicine ball at your chest and perform a sit up, lifting your upper body off the ground and touching the ball to your feet.
- Medicine Ball Russian Twists: Sit on the floor with your knees bent and feet flat on the ground. Hold the medicine ball at your chest and twist your torso to one side, tapping the ball on the ground. Twist to the other side and tap the ball on the ground again.
- Medicine Ball Plank: Get into a plank position with your forearms on the ground and your body in a straight line. Place the medicine ball under one forearm and hold for 30 seconds. Switch sides and repeat.
Tips for Using a Sit Up Medicine Ball Safely

Like any piece of exercise equipment, it is important to use a sit up medicine ball safely to avoid injury. Here are a few tips to keep in mind:
- Start with a lighter weight ball and gradually work your way up as your strength improves.
- Use proper form when performing sit ups or other exercises with the ball.
- Don't overextend yourself - if an exercise feels too challenging, take a break or modify it to make it easier.
- Always warm up before using the ball and stretch afterwards to avoid muscle soreness or injury.
Conclusion
If you're looking to add some variety and challenge to your core workouts, a sit up medicine ball is a great piece of equipment to consider. With a variety of exercises to try and benefits to reap, it's definitely worth incorporating into your routine.
